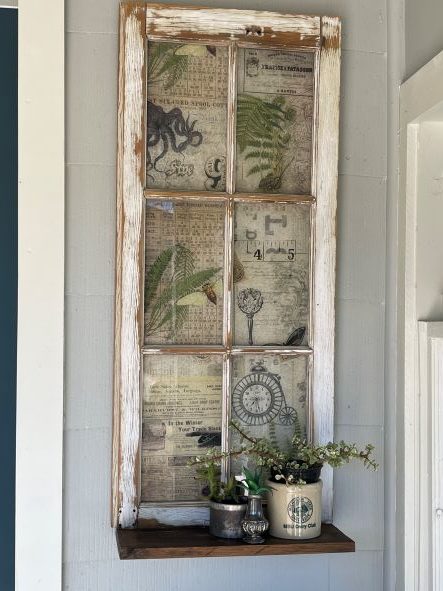
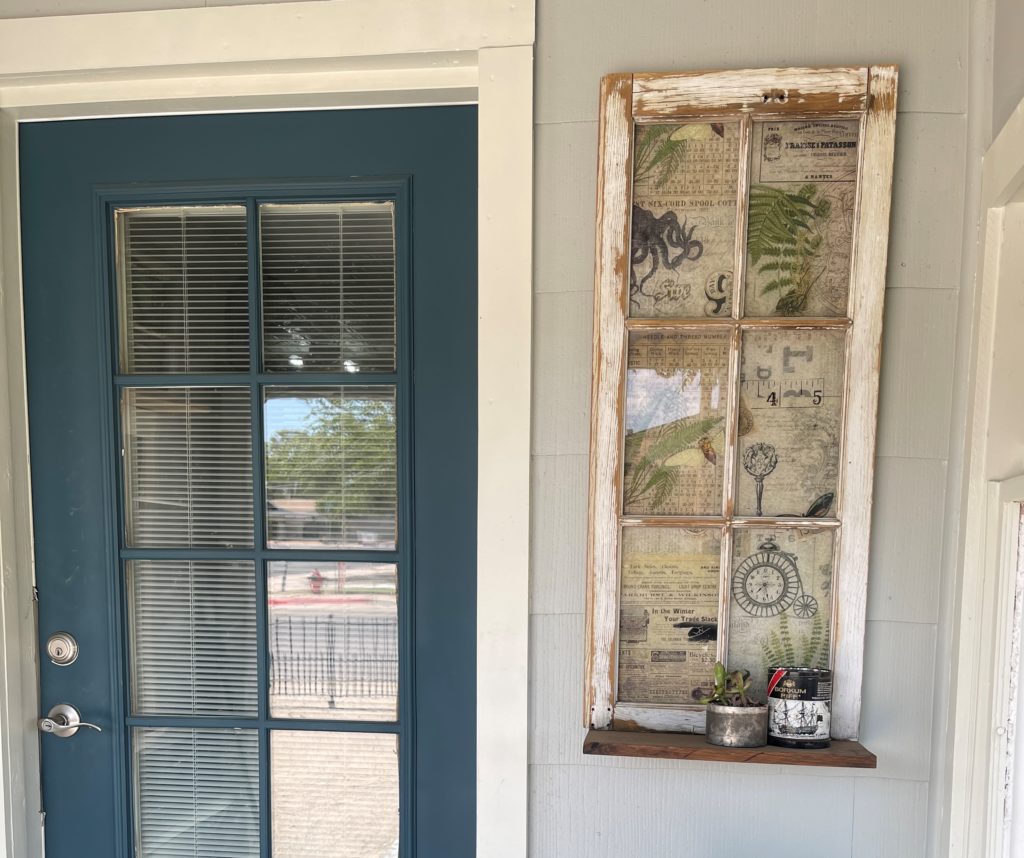
Here on Roycycled, I am working on updating my porch, and my first fun project to spruce the place up is an upcycled window shelf. I want tons of plants in this space, so reverse decoupaging the panes of this window will give us the perfect place to display some potted plants in style. Here’s what you’ll need and how to do it.
Subscribe to My YouTube ChannelSupplies
-
Paned window
-
Wooden shelf
-
Bactive Disinfectant Wipes
-
Rubbing alcohol
-
Paper towels
-
Paintbrush
-
Roycycled Industrial Masterboard Decoupage Paper, 2 sheets
-
Scissors
-
Wise Owl’s Clear One Hour Enamel, matte finish
-
Felt-tipped spatula tool
-
Craft dryer
-
X-Acto knife
-
Wise Owl’s Teak Handled Salve Brush
-
Wise Owl’s Furniture Salve
-
Wise Owl’s Natural Furniture Wax, Black
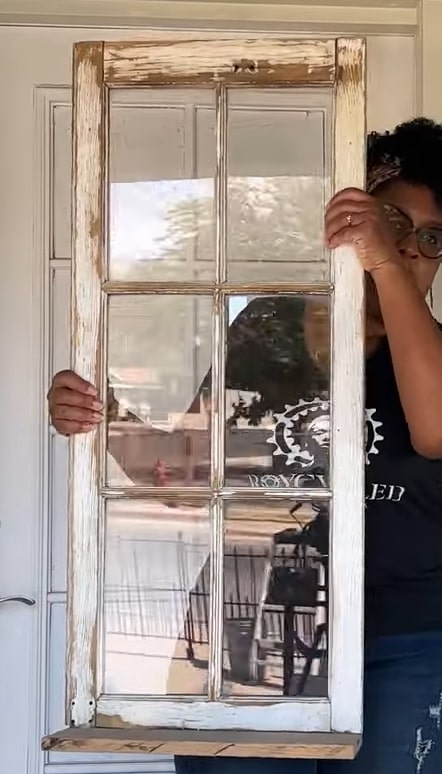
1. Attach the shelf to the bottom of the window.
Once we are done, we will be hanging the window outdoors and using the shelf to hold plants, so firmly attach the wooden shelf to the bottom of the window. You can use brackets for extra stability.
2. Clean the window panes. Squirt some rubbing alcohol into the pack of Bactive Disinfectant Wipes. I like to keep these packs of alcohol wipes around my shop because they make quick work of any cleaning that needs to be done and the alcohol dries quickly. Use the wipes to thoroughly clean the back of the window, since we’ll be doing reverse decoupage today (i.e. decoupaging the back of the window with the paper lying face down). Reverse decoupage makes it much easier to clean the front side of the window without damaging our work, which is great given that this project will be hanging outdoors and will probably get very dusty here in Arizona.

3. Dry the window panes. Use paper towels to dry the window panes we wiped down. This will ensure that no smudges are left behind, which is important because we’ll be decoupaging this side of the glass, so anything that’s left behind will show on the other side of the glass, and at that point we won’t be able to do anything about it.
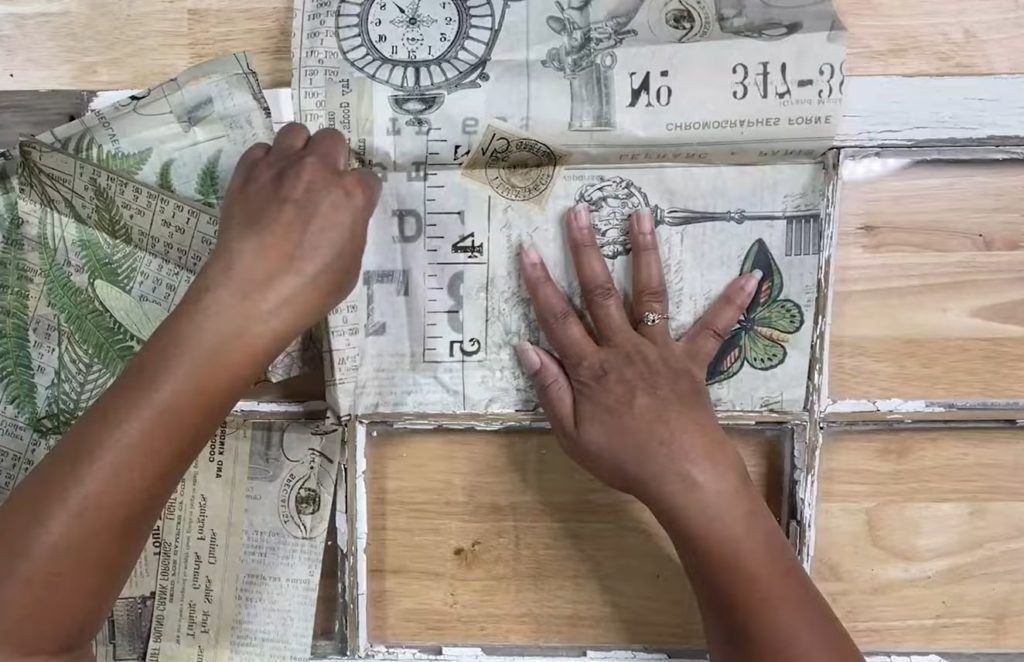
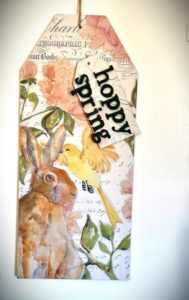
4. Lay out Roycycled decoupage paper. Now that we have the window cleaned, grab your decoupage paper. For this project, I’m very excited to be using a Roycycled decoupage paper called Industrial Masterboard.
This design is inspired by masterboards created by junk journalists when planning a tag. By creating one large masterboard and then cutting pieces from it, they ensure that their projects have variety while still being cohesive. I found that idea very inspiring and planned this pattern so that you could use it for several projects and have them not match exactly but still coordinate well. In this case, I have two sheets of the Roycycled decoupage paper, because I think I will need more than just one to cover all of the panes of this window.
 Find A Roycycled Retailer
5. With the Roycycled decoupage paper in hand, decide which sections of it you want visible through each pane. Lay that section of the paper down in the pane and use your fingernail to score the edges; this should create a crease that you can then use as a guide for trimming the paper.
6. Decoupage. With the Roycycled decoupage paper trimmed down, it’s time to actually decoupage. For more detailed explanations of how to decoupage for beginners, make sure to check out my playlist of tutorials here.
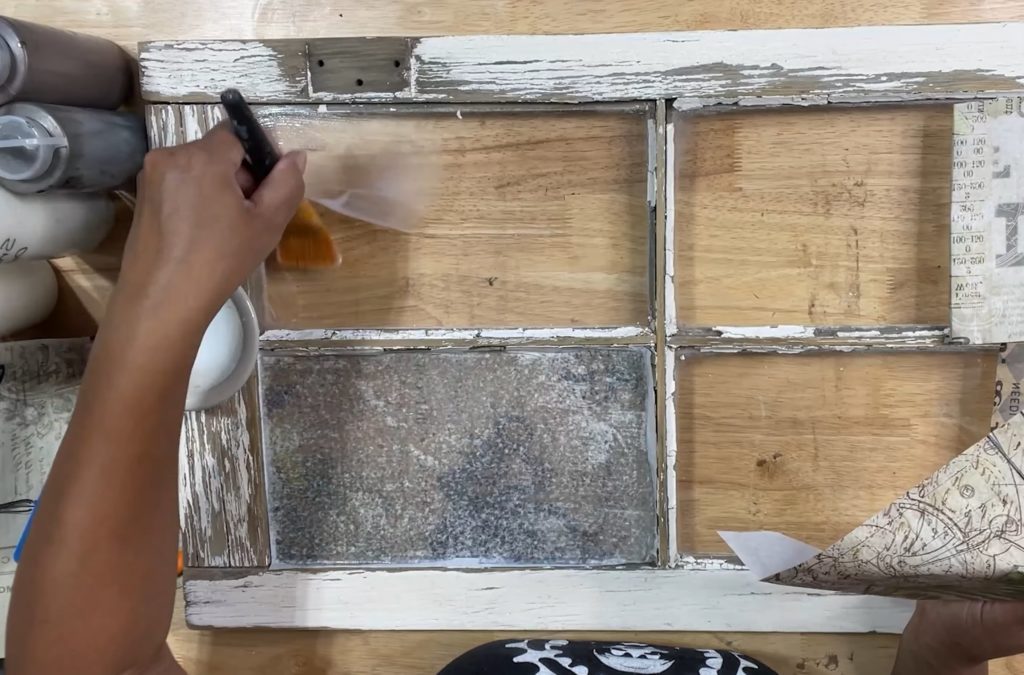
A. Adhesive.
I am using Wise Owl’s One Hour Enamel in a matte finish, but it’s also available in a satin or semi-gloss finish if you prefer a glossier surface. In fact, a glossier finish may be better in this case because you’re less likely to get any haze on the other side of the glass, but the matte finish enamel is what I had out so I’ll use it for convenience. I’ll be using this enamel as both an adhesive and to seal my Roycycled decoupage paper. Using a paint brush, spread the enamel onto the first window pane.
B. Paper.
Paste the Roycycled decoupage paper down onto the pane with the enamel brushed on. To do this, start by pasting the sheet down at one end to create an anchor row. From there, slowly work your way to the other end as you lay the paper down, using the felt-tipped spatula to gently work out any wrinkles or air bubbles. Make sure that the sheet lays flat and has good contact with the window pane.
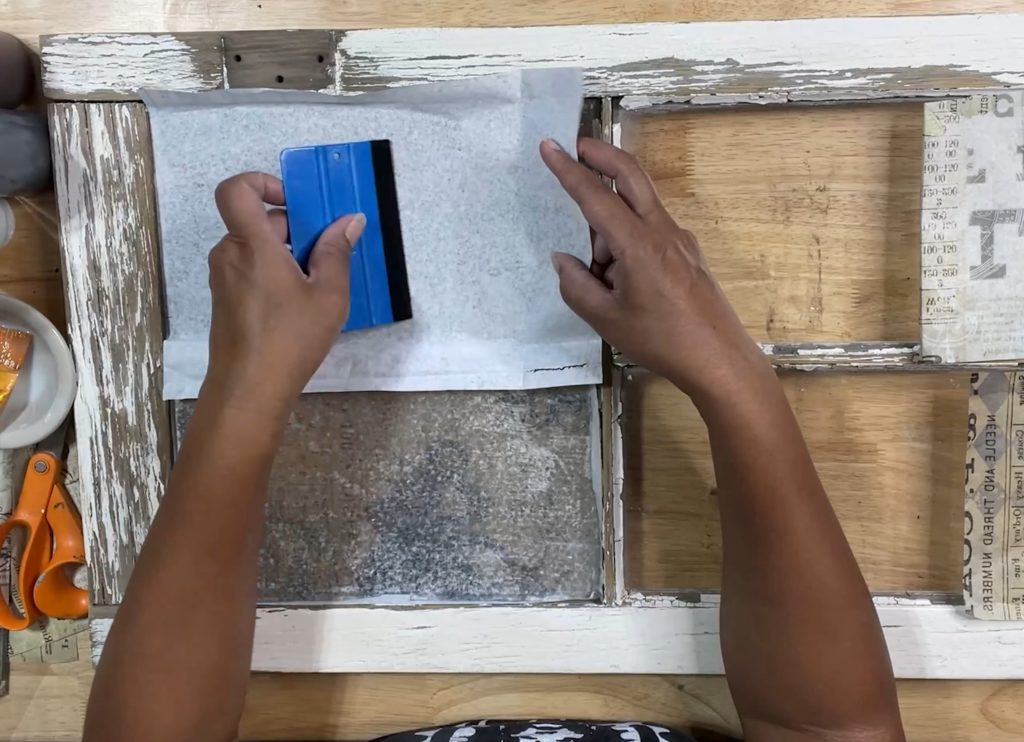
C. Seal.
Once the Roycycled decoupage paper is fully pasted down to the pane, brush an additional layer of enamel on to fully seal it. Be careful not to get product on the wooden frame of the window, as the paper will stick anywhere the product is. Allow to dry.
D. Repeat.
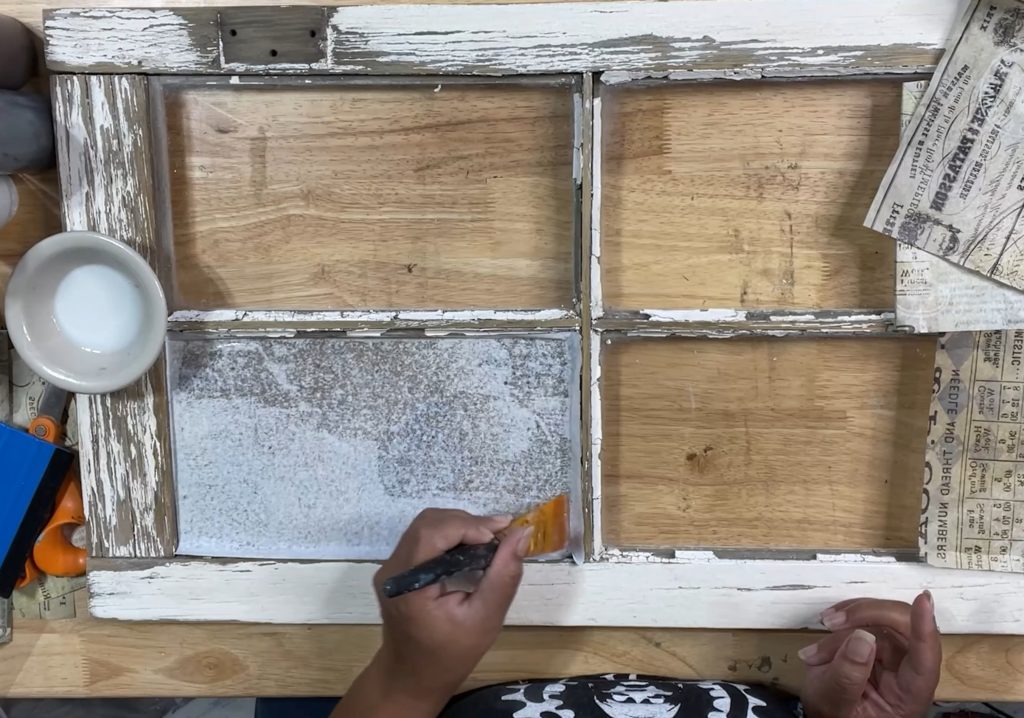
Repeat steps a-c for all panes of the window.
E. Dry.
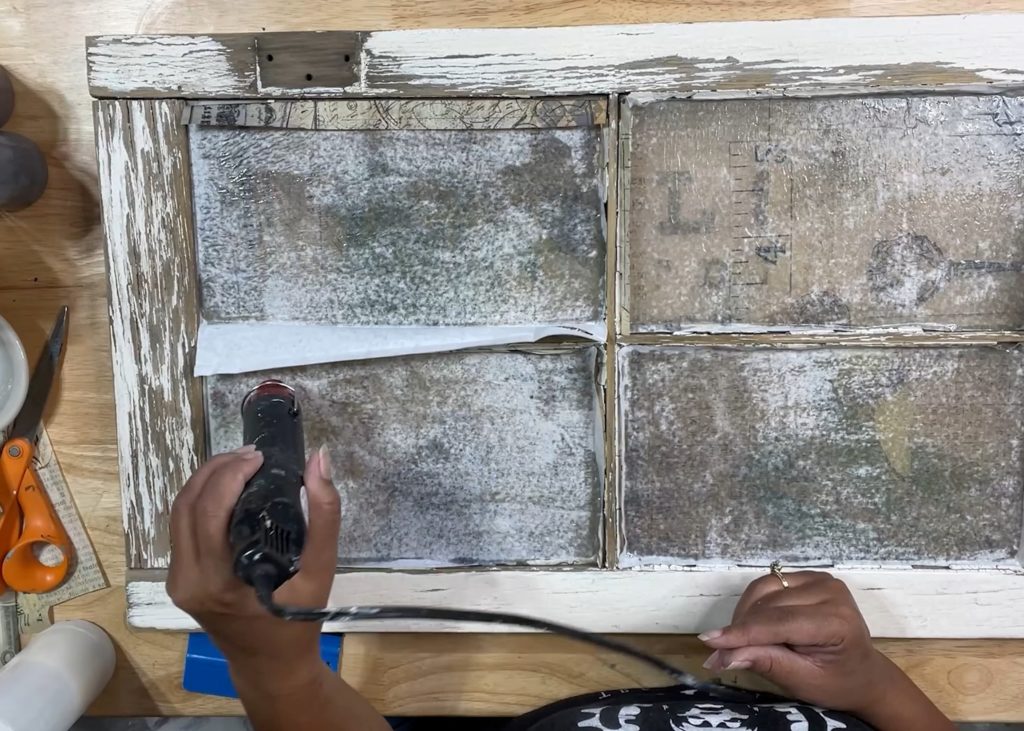
Once done, go over the drying adhesive with your craft dryer. Note that since we are working with glass, heating the glass up too much or too quickly can cause it to crack. To avoid this, start with the craft dryer farther away from the window and keep it moving across the surface, and then move in closer as the glass warms up. Pay special attention to the edges to make sure they’re dry, or else trimming the edges may cause them to pull and tear.
F. Optional steps.
At this point in the process, I am finding that I like the soft transparency of the Roycycled decoupage paper as is, so I won’t make any other changes to it. However, if you wanted your decoupage to be really bright and pop off the surface, you could paint white on the back of the Roycycled decoupage paper here, and it will stand out a lot more. You could also use a glaze on the back of the Roycyled decoupage paper to add a grunge effect before painting over it with white. See this tutorial for an example of these steps in action to see how they look so that you can decide for yourself!
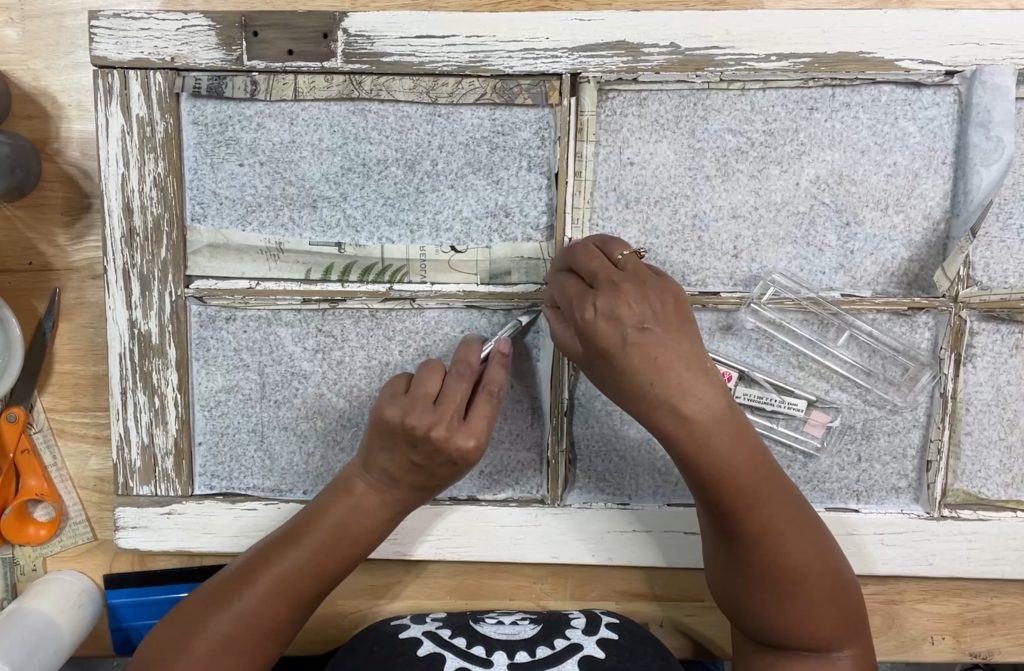
G. Trim.
Trim the excess on the edges of the Roycycled decoupage paper using your X-Acto knife. To get the cleanest cuts, make sure that your edges are completely dry, your blade is very sharp, and the sheets are tacked down firmly all the way to the edge of the pane.
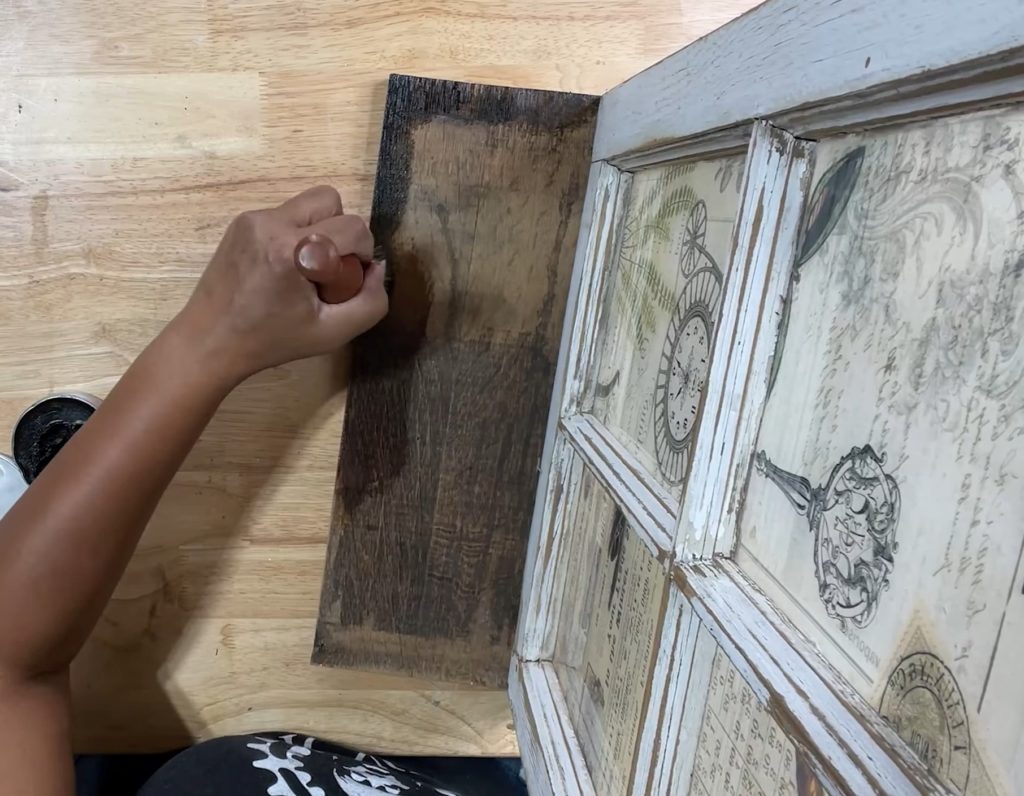
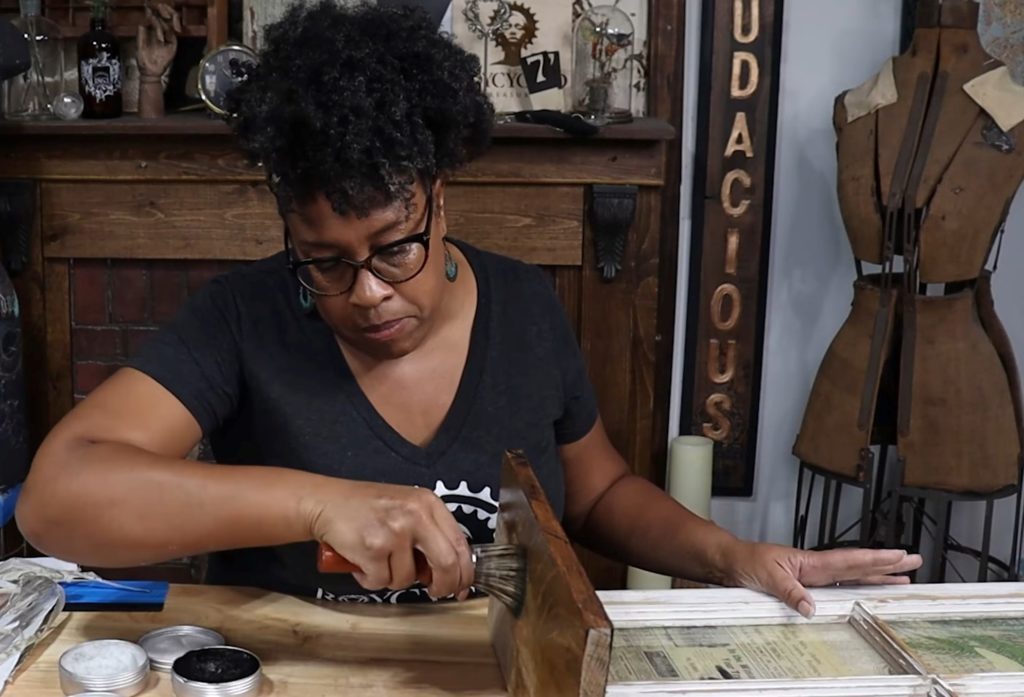
7. Apply black wax to the shelf’s edges.
Use your Wise Owl Teak Handled Salve Brush to brush Wise Owl Furniture Wax in the color black around the edges of the shelf to create a halo and deepen the color. I will just be applying this wax to the top of the shelf; since the sides and bottom won’t be as visible, I don’t want to waste the wax on those surfaces.
8. Apply the furniture salve to the shelf.
Use the same Wise Owl Teak Handled Salve Brush to brush the Wise Owl Furniture Salve onto the whole shelf and blend out the wax we applied in the previous step. This makes the halo effect more subtle. The salve will also condition and seal the shelf.
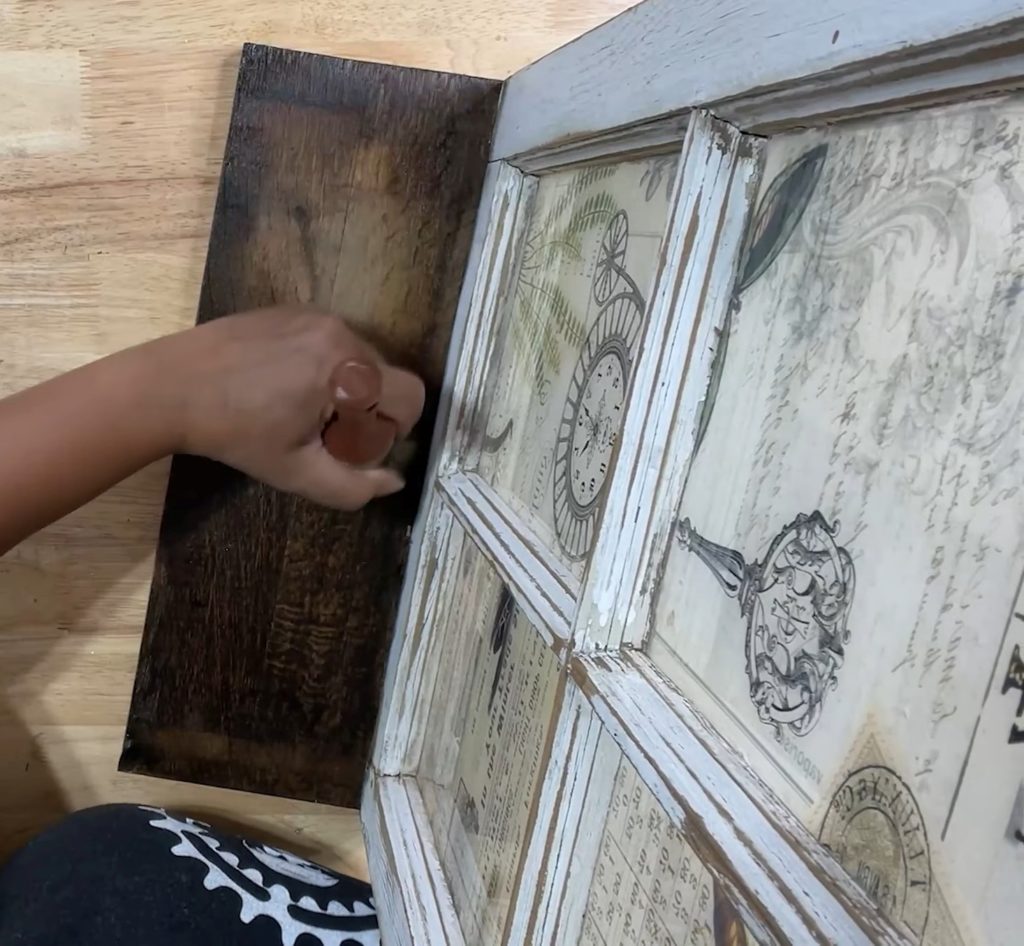
Make sure to salve all surfaces of the shelf, including the sides and bottom, to fully breathe some life into it and give it some protection against the outdoors.
9. Hang, decorate, and enjoy! Here’s the final result!
