
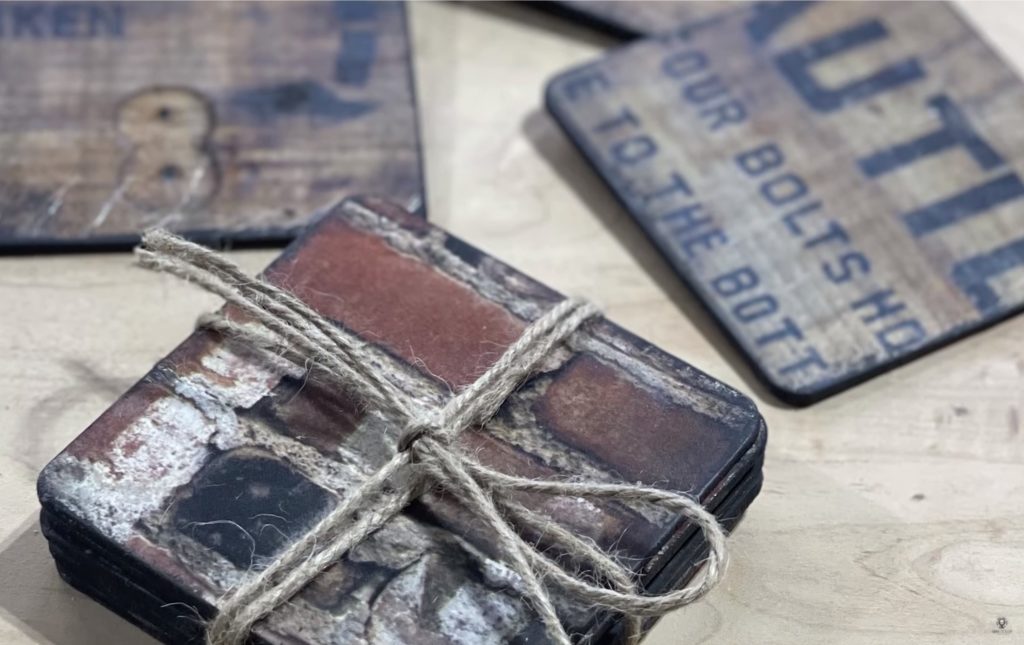
The holidays are in full swing, and pretty soon we will all be attending dinners and parties. These DIY decoupage coasters are a quick and easy way to create personalized gifts as a special thank you to your loved ones who host you this holiday season.
Subscribe To My YouTube ChannelSupply List
-
Unfinished wood coasters
-
Roycycled Decoupage Paper
-
Wise Owl Chalk Synthesis Paint in Antique Villa
-
Funkiture DIY Rock Hard Top Coat (Marine grade for water resistance)
-
220 grit sanding block/paper
This list contains some affiliate links. If you click and purchase I may receive a small commission at no extra cost to you. I only recommend products I have purchased, used, and enjoy.
Prepping Your Coasters
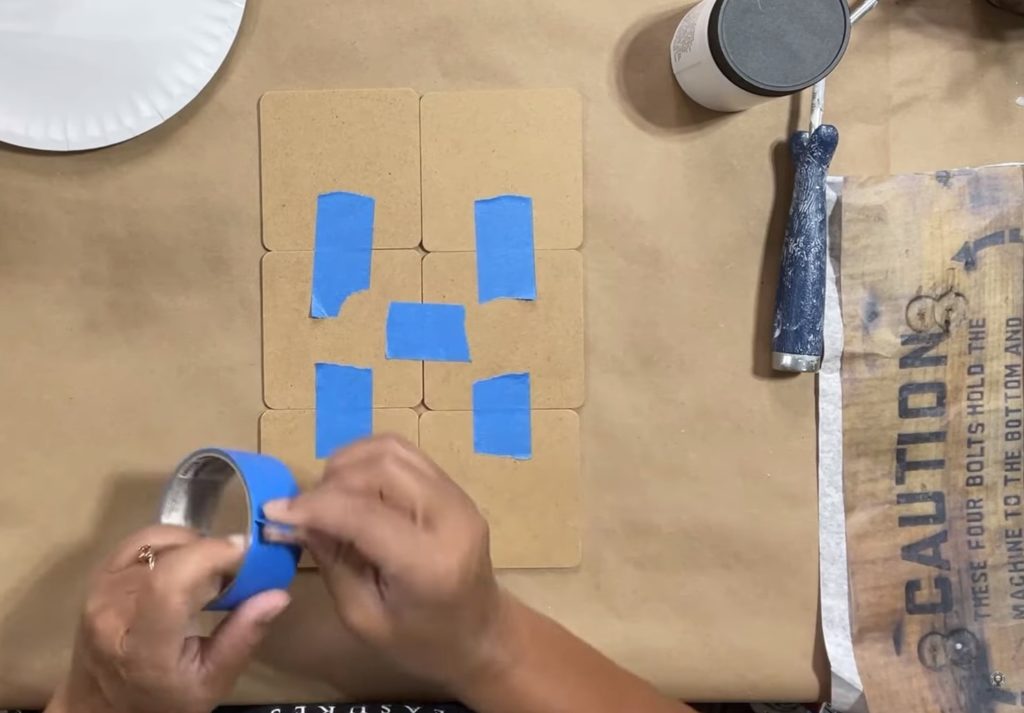
Start your project by turning your coaster blanks over so the backs are facing up, and tape them together. This will allow you to paint them as one surface, instead of one by one. Once they are taped together (I did 6 at a time), turn them over. Paint your surface with light-colored paint or primer. I used a foam roller to make quick work of the task. The bright surface will allow the image on your decoupage paper to really pop! Let your paint dry, and then flip your coaster back over. On the backside, adjust your tape to allow a small space between each coaster. This will make it easier to trim your coasters once you have decoupaged them.
 Find Your Roycycled Decoupage Paper Retailer
Decoupaging Your Coasters
Roycycled Decoupage Papers come in 20” x 30” sheets. For this project, I used Roycycled Industrial project Blocks paper. There are 4 industrial designs included on this sheet. The first step is deciding which portion of the design you would like to be decoupaged on your coasters. Once you decide, trim any excess leaving about an inch overage on all sides. Don’t worry about trimming perfectly, we’ll address that later. Once you’ve decided how you want your paper positioned, hold it in place.
Step One
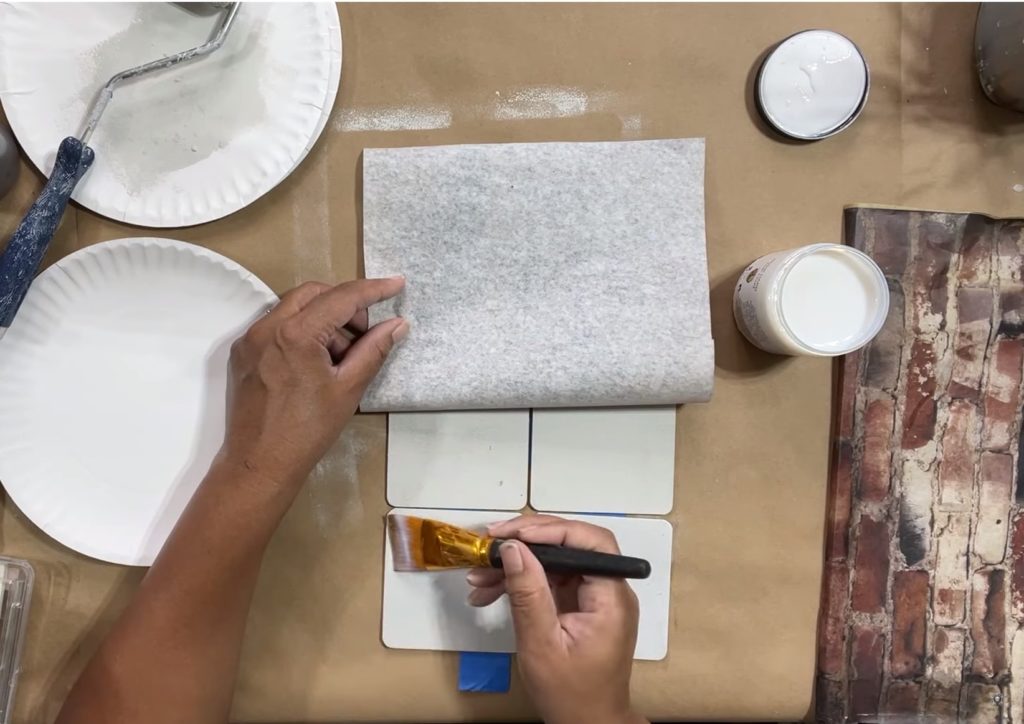
The best way to approach large-scaled decoupage projects is to do it in sections. I begin on the side of my non-dominant hand. Holding the paper in place, I fold the paper over on itself, and begin applying Funkiture DIY Rock Hard Top Coat to the surface using a Wise Owl Micro Angle Paint Brush. Make sure you cover the entire surface with an even coat. Any dry spots or unevenly applied areas will cause bubbles later. You may have small wrinkles, but don’t worry. Most of them will disappear as the paper dries and shrinks. Be careful not to puddle the product. Too much moisture can cause your Roycycled Decoupage Paper to tear during the decoupage process.
Once you’ve applied your Funkiture DIY Rock Hard Top Coat, about 1/2 of the way across your group of coasters, apply the paper.
Rub gently from the inside out pushing out any bubbles. Once this section is anchored, you can fold the paper back over the attached area, continue applying your decoupage medium, and adhere the paper one section at a time until you’re done. If you use a piece of plastic or plastic wrap, you can manipulate the paper a little more without the risk of tearing your paper.
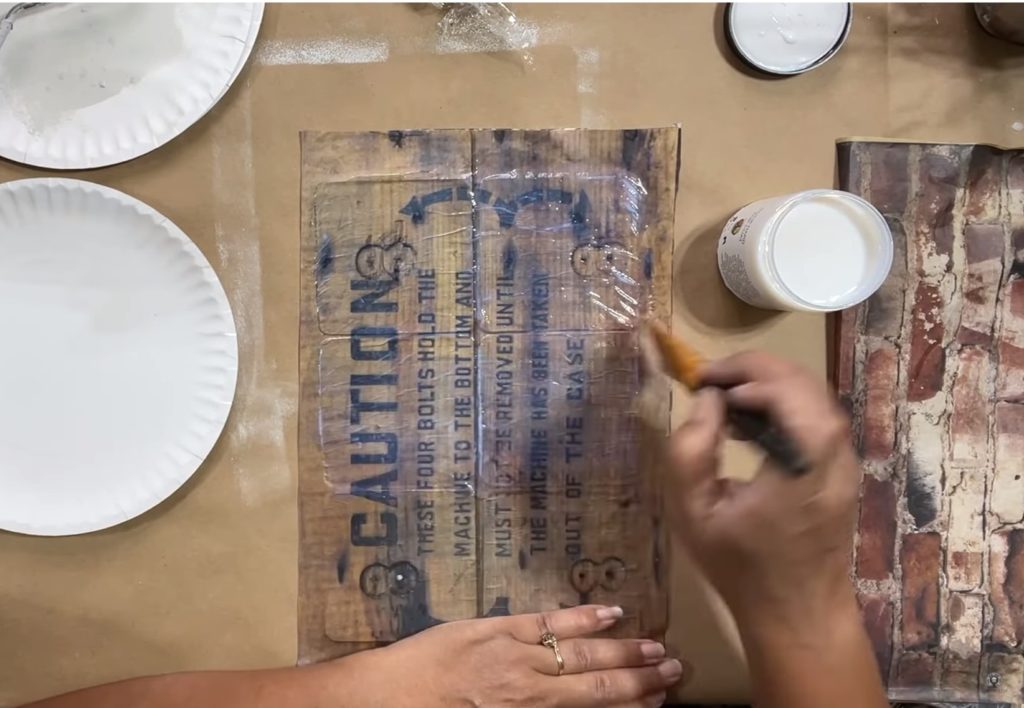
Follow up with a final coat of marine grade Funkiture DIY Rock Hard Top Coat to protect the surface. If your project is going to be used a lot, you may want to apply two coats. When you apply the sealer, bubbles and buckles will appear. Don’t panic! Walk away and let the project dry completely. The paper will shrink when it dries, and the wrinkles will disappear like magic.
Step Two
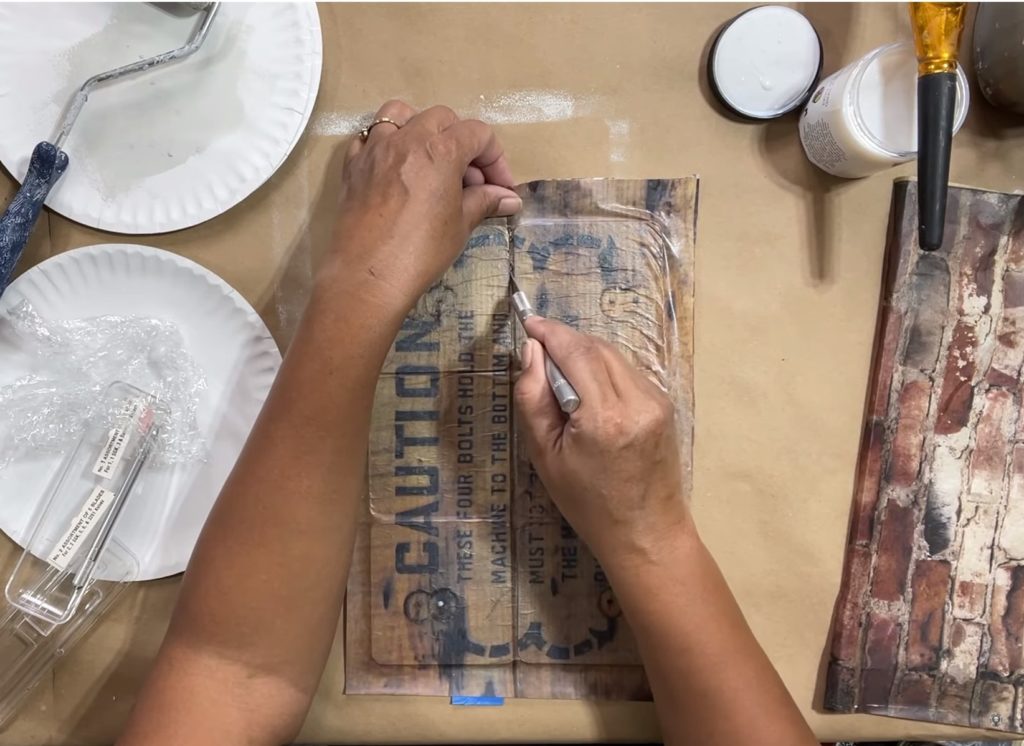
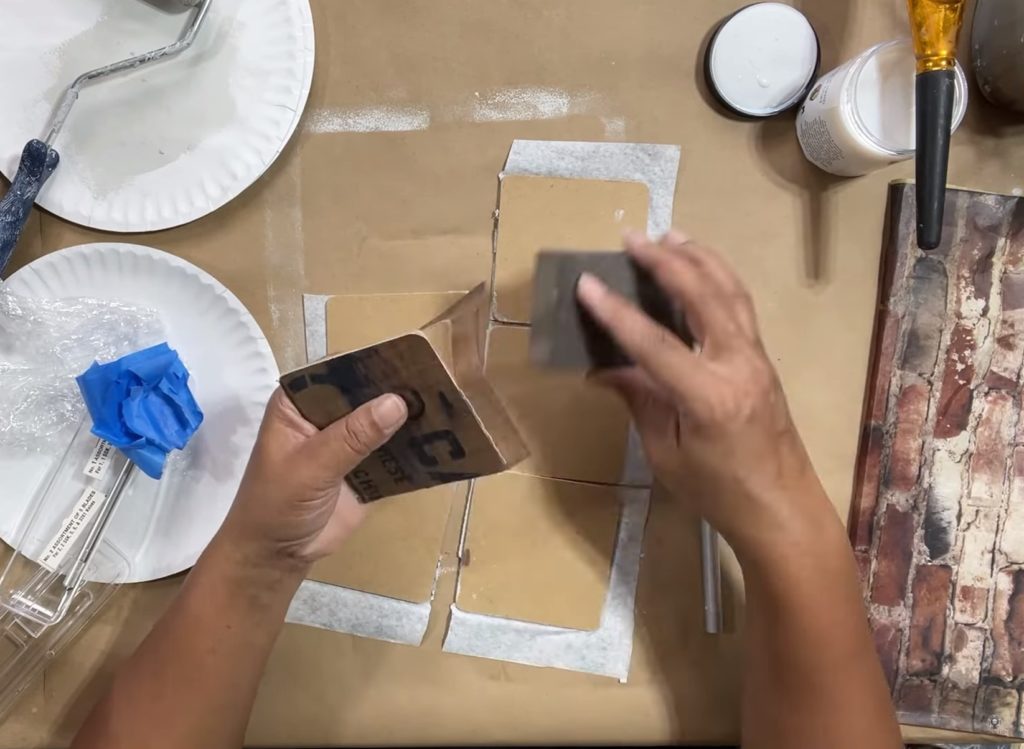
Once your paper is dry, it’s time to trim. Remember when you adjusted your tape to allow space between each coaster? This is when that space is important. Using a sharp blade, slit your paper by cutting in the spaces between the coasters. Be sure and let your paper dry completely, and use a sharp blade to prevent tearing. Remove the tape from the back of your coasters, and they should come apart.
The easiest way to trim the remaining paper is to use a 220-grit sanding block. Sand the edges of your coasters in a downward motion until the paper begins to “cut”. Continue this process all the way around each coaster until they are completely trimmed.
Step Three
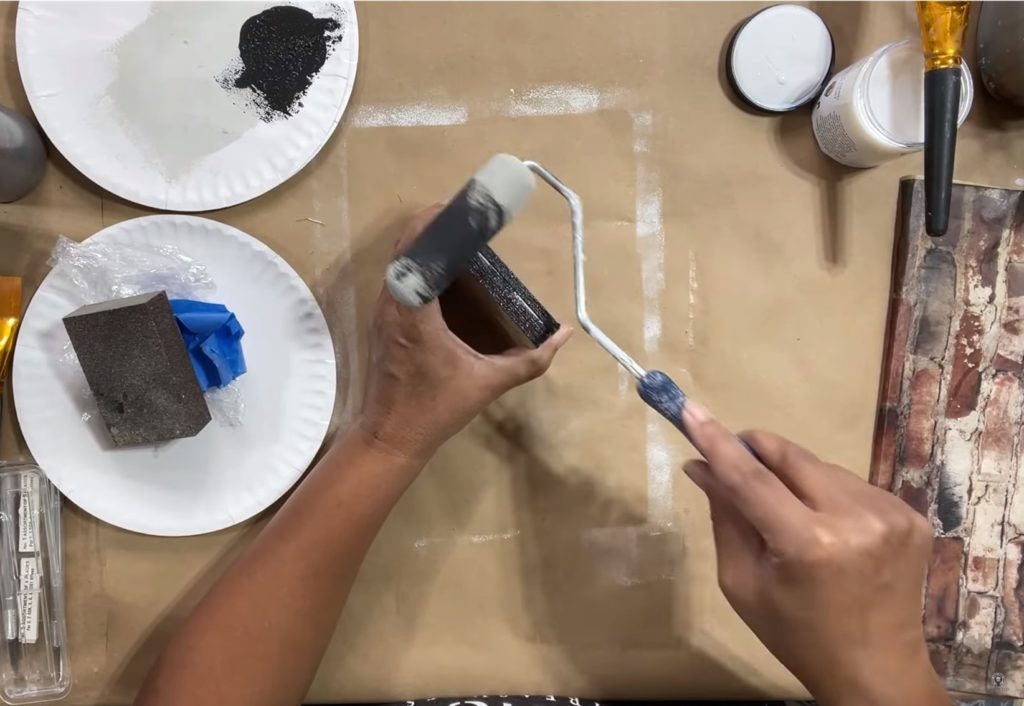
Once your coasters are trimmed, stack them together in order to paint the outside edge. This will give your coasters a finished look. You only want a little paint on your roller. Too much paint and the paint may seep in between your coasters. Be sure and hold them together tightly. Using your sponge roller, roll your desired paint color over the edges.
