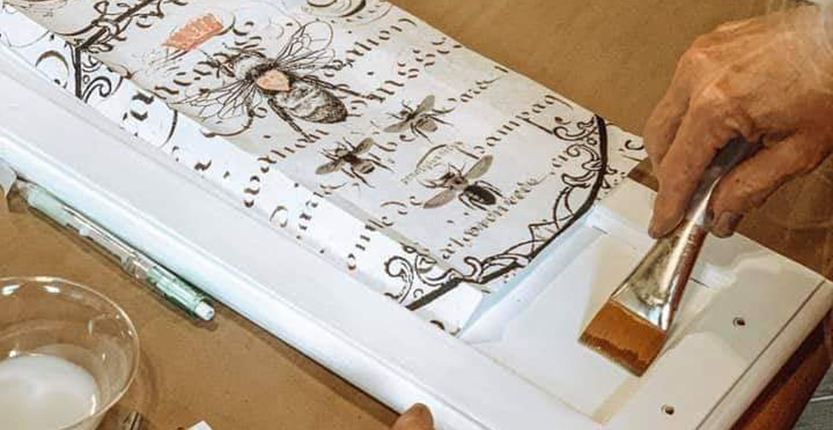
My love of decoupage began with my love of ephemera — I was desperate to find a way to include beautiful script, typography and images of days gone by to my furniture makeovers. And so began my love of decoupage.
The decoupage designs that I create celebrate my love of ephemera, but each sheet’s scale, weight and size make them perfect for furniture decoupage projects.
Many people are afraid to use the sheets, and have questions about how to achieve a beautiful finish using decoupage.
I always begin my decoupage projects with a clean white canvas. Even if I’m going to be using a dark design to decoupage, I still paint white underneath. The white makes the designs pop.
If you would like your image to be more subtle, you can paint the area underneath your decoupage close to the colors used in the decoupage paper design.
I use Wise Owl Varnish when I decoupage my furniture pieces. The consistency is perfect for decoupage and the varnish offers durability.
The most daunting thing about decoupaging furniture, is the size of the project — but don’t be afraid.
The way to address the size of the project is by completing it in sections. I lay down my product in sections approximately 12-inch by 12-inch depending on the size of the project. By laying the paper down in sections, you can better manager larger projects.
Supplies needed:
- Decoupage paper {link to website listing retailers}
- Quality water based varnish (I prefer Wise Owl Varnish) {Link to Varnish listing}
- Quality paint brush (I prefer Wise Owl’s Mircro Brush) {Link to Micro-brush listing}
- White paint or primer {Links to website listings}
- 220 grit sanding block
- Exacto knife
Prep
Prepare your surface by insuring it’s clean and free of any dirt, wax and/or oils (See: HOW TO PREP FURNITURE for more information on this topic). Once the surface is cleaned and dry, paint with coat of white paint or primer, and let dry
Sizing your paper
Cut your decoupage paper to remove most of the excess, as this will make it easier to handle. Give yourself margin for error by leaving at least a 1-inch overhang on each side. Don’t worry about the extra paper; you will be able to trim any excess after your decoupage has dried.
Varnish
Begin applying varnish on one section of your project. Align your paper over the section beginning with one end. Smooth your paper using your hand, starting from one edge and moving toward the middle. It’s OK to apply some pressure, but be careful not to tear the tissue.
Once this section is adhered, fold your paper back and repeat the process.
It’s important you don’t unload your brush close to the paper. Begin applying varnish about 1-inch before your fold, and move close to the paper after you have unloaded some of your product from the brush. This will help minimize puckering on the folds.
Be sure to cover the decoupage area completely with varnish, as any areas left dry will result in bubbles.
Varnish the top of the paper
Once your paper is completely adhered, brush another coat of varnish over the top of the paper. The paper will wrinkle a bit, but don’t panic. Once the paper dries, it will shrink and most of the small wrinkles will go away.
You’ll want to inspect your edges. Any lifted edges will need more varnish underneath. After adding a little more product, rub edges down until they are adhered.
Sanding
Once your decoupage paper has dried, use a sanding block to trim the excess. The lowest grit you should use is 220. Anything lower may actually tear your edges.
Use your sanding block along the edges and be sure and only sand in one direction, down and away from your decoupaged area. If you sand in multiple directions you can pull and/or tear your adhered sheet.
If you are decoupaging an area that has an insert, you will use your Exacto knife around the edges of the decoupaged area.
Now you can enjoy your creation. If you are decoupaging a table top, or other high traffic area, lay down an extra layer of sealer for added protection.

