“There isn’t anything I taught today that you can’t absolutely do. You can do this, and you can do it today.”
Sometimes, the most powerful thing we can do creatively is try something new
If you’ve ever found yourself staring at a piece of decoupage paper, wondering what would happen if you took a brush to it—this one’s for you.
In this tutorial, I’m walking you through exactly how I transformed the Roycycled Paintable Floral Decoupage Paper from neutral to next-level using just three colors of paint (and a little curiosity). This post is for all my Roycycled Besties who are ready to experiment, grow, and have fun with their art—without needing fancy supplies or complicated techniques.
Supplies I Used
- Roycycled Paintable Floral Decoupage Paper
- Roycycled Script Love Decoupage Paper (for the background)
- Decoupage medium (like Wise Owl’s One Hour Enamel or any water-based top coat)
- Clear gesso (or watercolor ground if using watercolor)
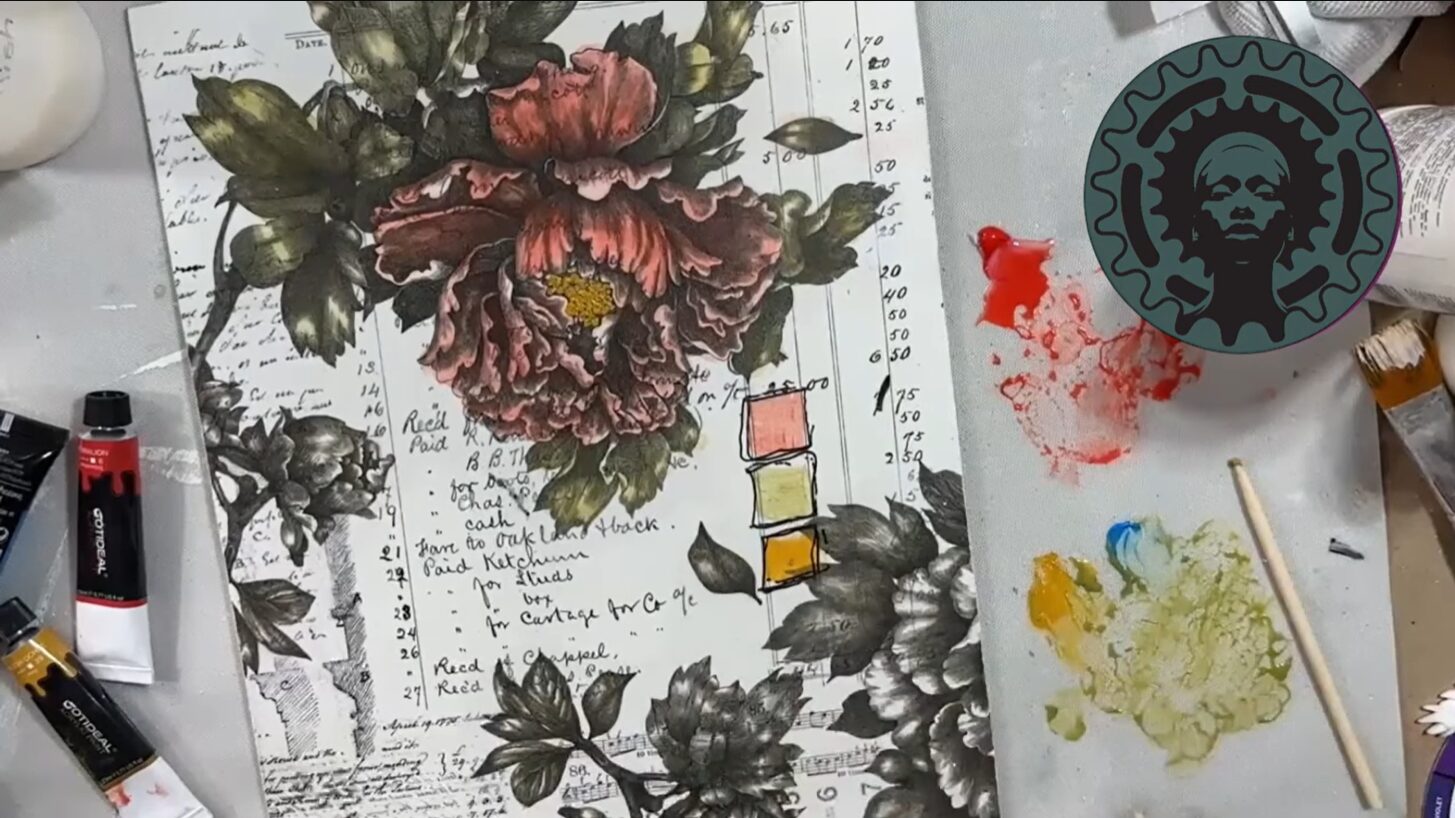
- Acrylic paint (I used red, ochre yellow, and blue)
- A brush (plus a second clean brush for lifting highlights
- Spray bottle (for misting your paper)
- A skewer or small tool for adding texture
- Optional: waterproof pen or paint marker
Step-by-Step Instructions
Step 1: Start With Your Background
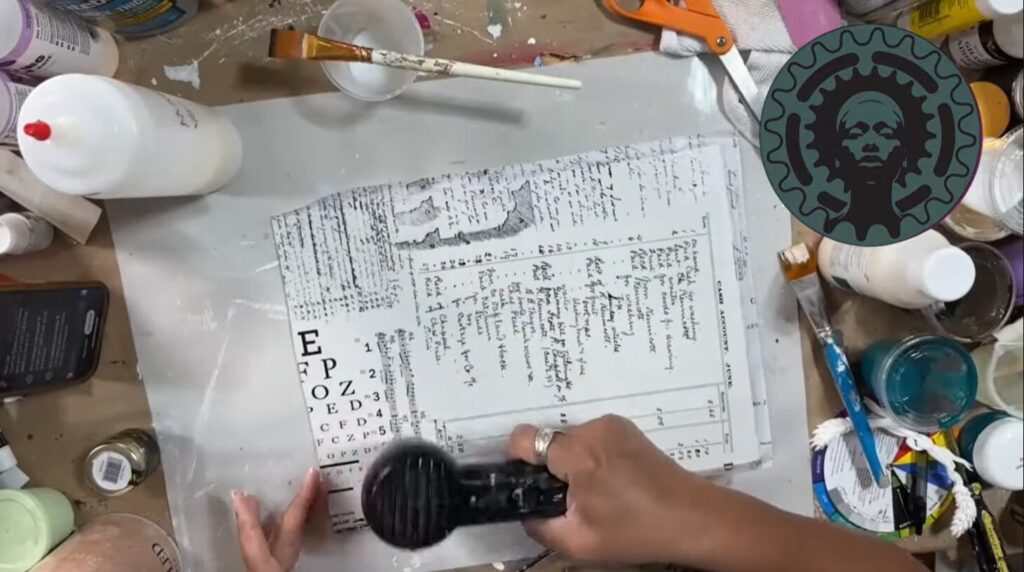
I started with Roycycled’s Script Love Decoupage Paper as a soft, neutral base. This layered look helps the flowers stand out while giving your project a rich, vintage-inspired foundation.
Pro Tip: Don’t overthink the background, it’s just the stage for your star (the floral!). Soft patterns or script papers are ideal for layering.
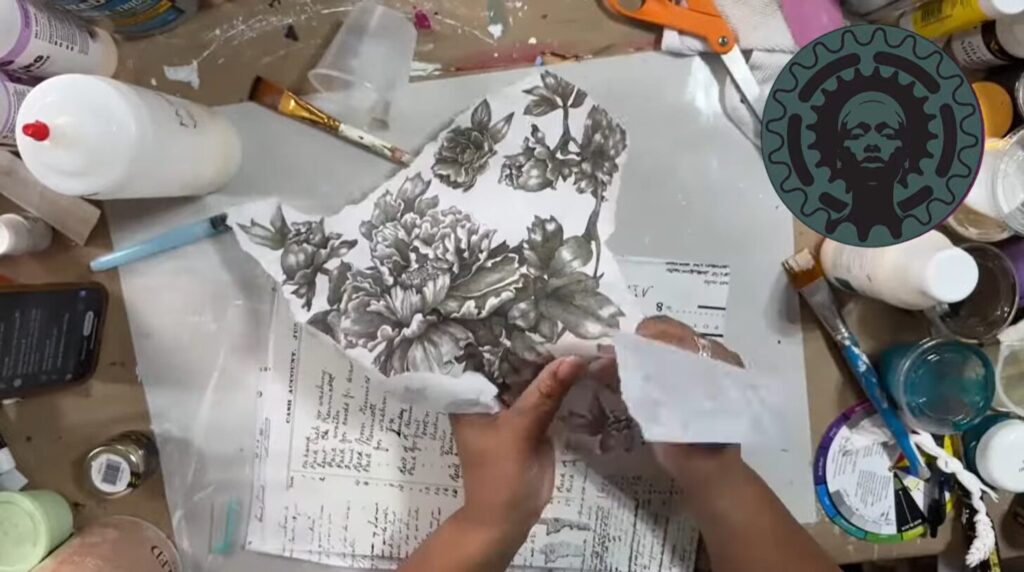
Step 2: Tear Your Flowers (Don’t Cut Them!)
I wanted the florals to blend in organically, so instead of cutting them out with scissors, I tore around them. The torn edges help avoid harsh lines that can distract from the design. You can also achieve an organic edge using the wet paintbrush method. Floating a transparent texture medium, or extra-thick gel medium, can disguise the physical edges of your decoupage paper.
Why it matters:
A straight cut edge will catch the eye, but a soft, feathered tear will blend beautifully, especially when decoupaged over a white or light background.
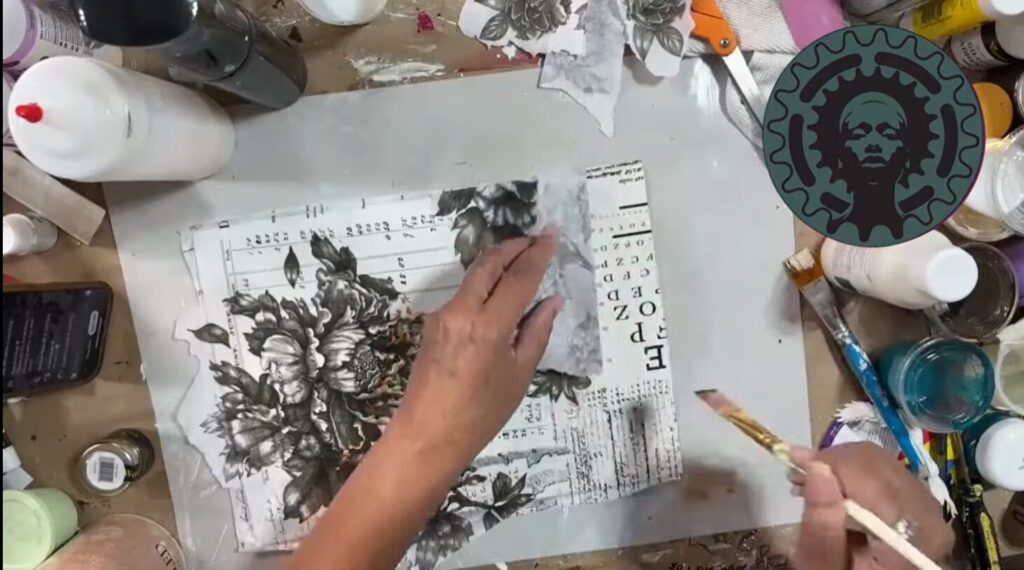
Step 3: Mist & Decoupage the Paper
Before laying anything down, I gave the floral pieces a quick mist of water and gently stretched them. This helps prevent wrinkles or buckling once the decoupage medium hits.
Apply your decoupage medium where you want the paper to stick, press the paper down, and go right back over the top with more medium. That second coat helps the tissue go transparent and really melt into the surface. For more details about maximizing the transparency of Roycycled Decoupage Paper, check out my blog article titled “Decoupaged Lazy Susan.”
Reminder: Don’t worry about tiny imperfections. The goal isn’t perfect…it’s possible.
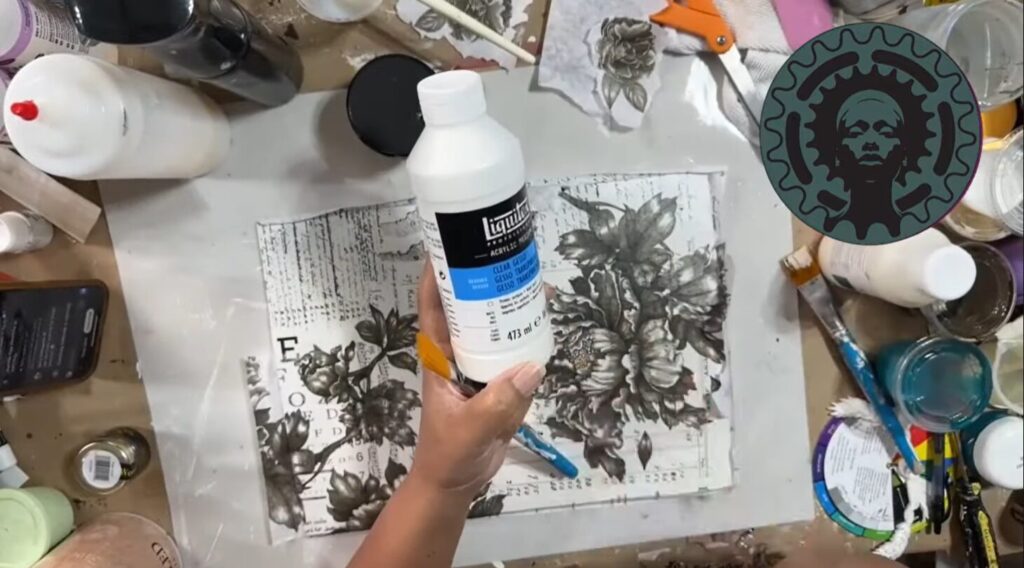
Step 4: Seal the Surface for Painting
Once everything is dry, I apply a layer of clear gesso to prep the surface for paint. This gives a little grit and tooth for the acrylics to stick to. If you don’t have clear geso, no worries. You can still paint your paper, but the first layer of paint may bead up some. Just let that layer dry, and move on to the second coat.
Watercolor user?
Try watercolor ground instead of gesso for watercolor. Although you can use watercolor over gesso, the watercolor ground just receives watercolor better. Do you want to learn more about which acrylic mediums to use when? Snag my free Acrylic Medium Guide
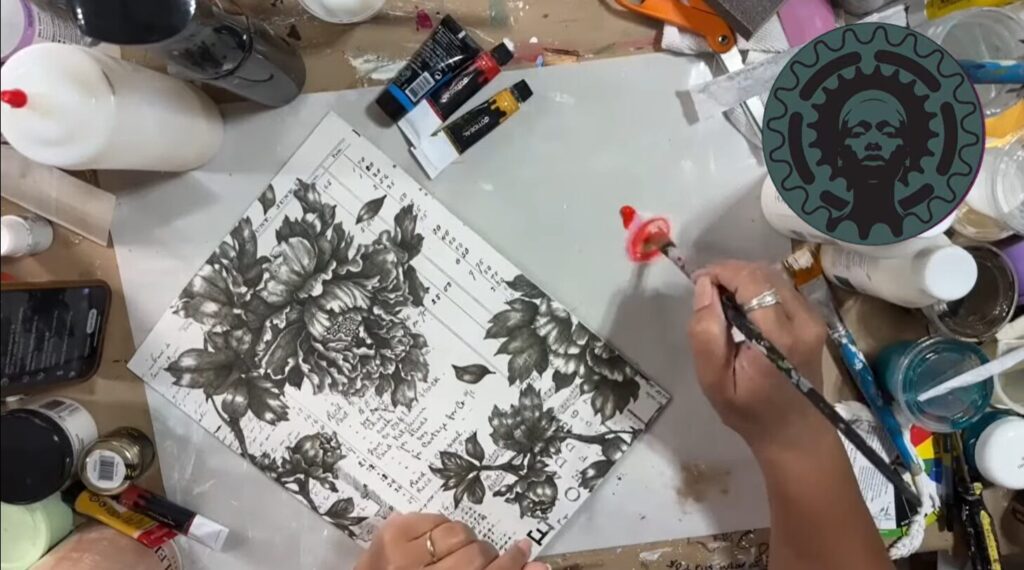
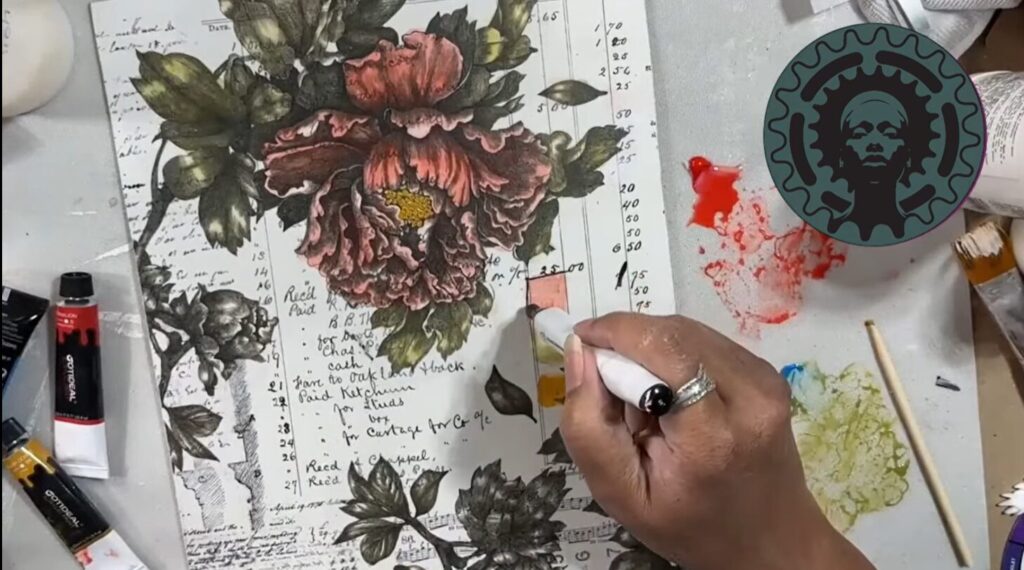
Step 5: Create Your Paintable Glaze
I mixed a little acrylic paint with my decoupage medium to create a sheer glaze. This allowed the original shadows and highlights printed on the flower to peek through while giving me color to play with.
You don’t need fancy paint for this. I used super inexpensive tubes from TJ Maxx. The real magic is in the layering and the lift.
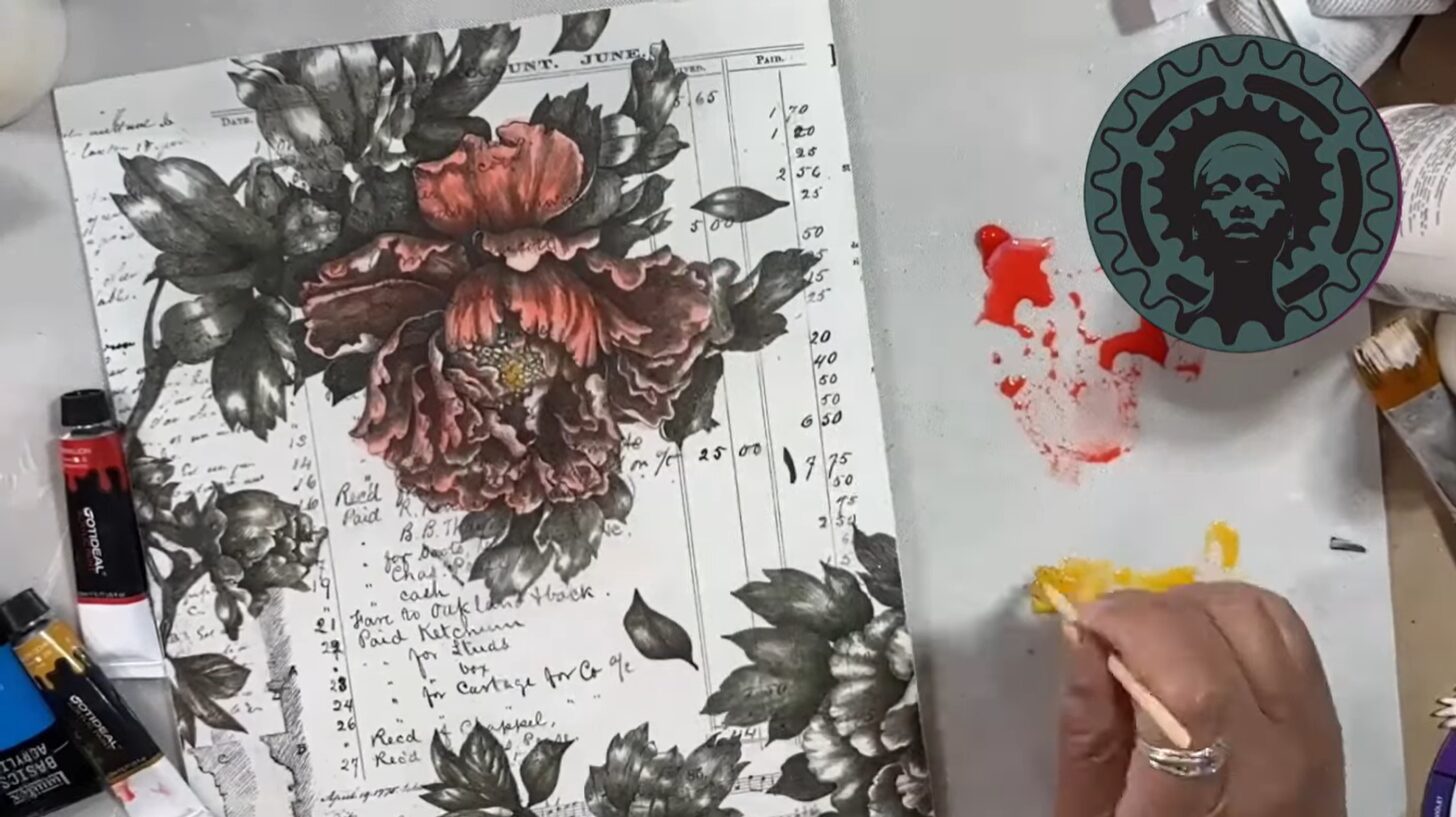
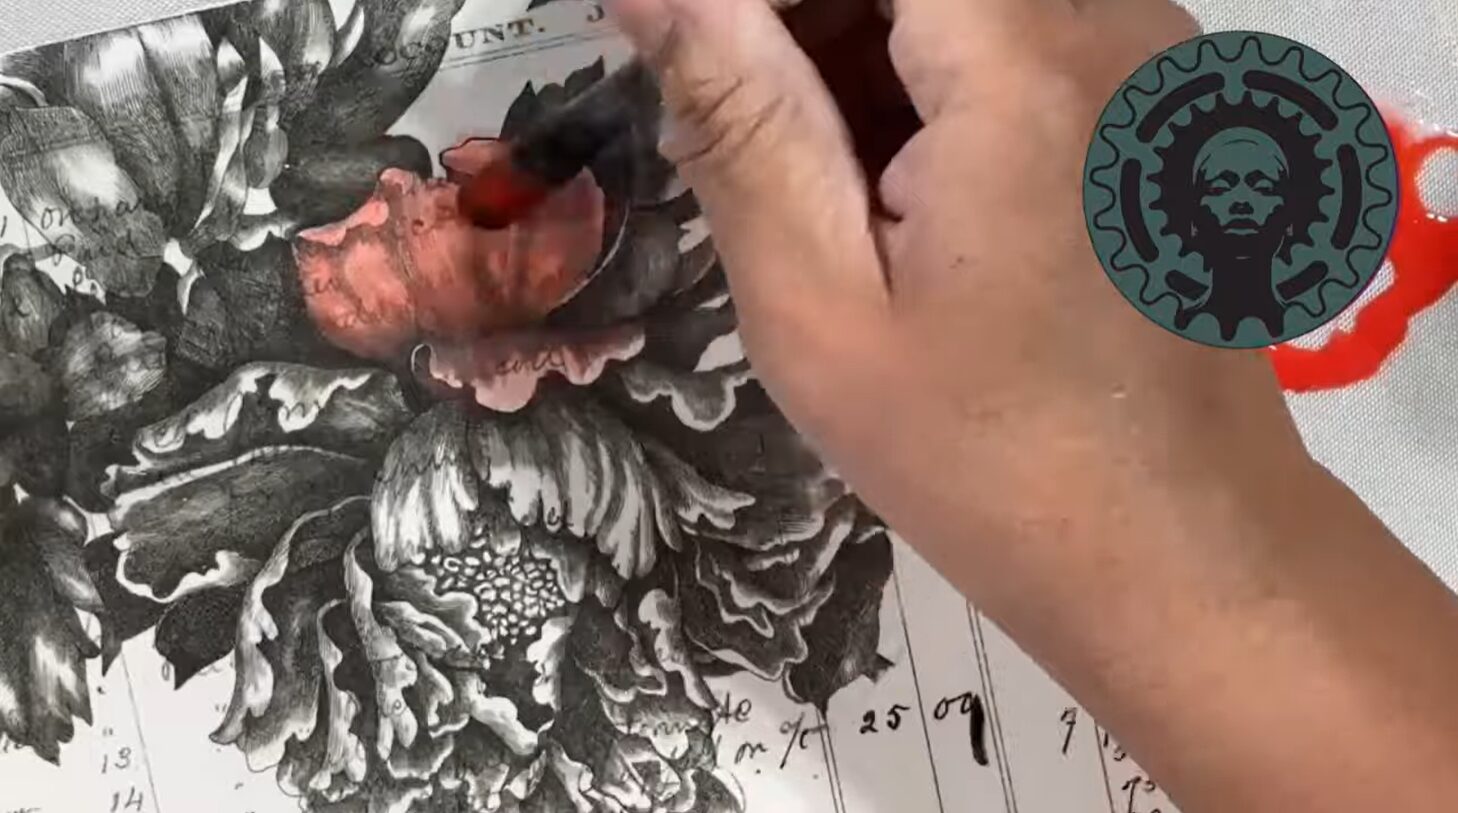
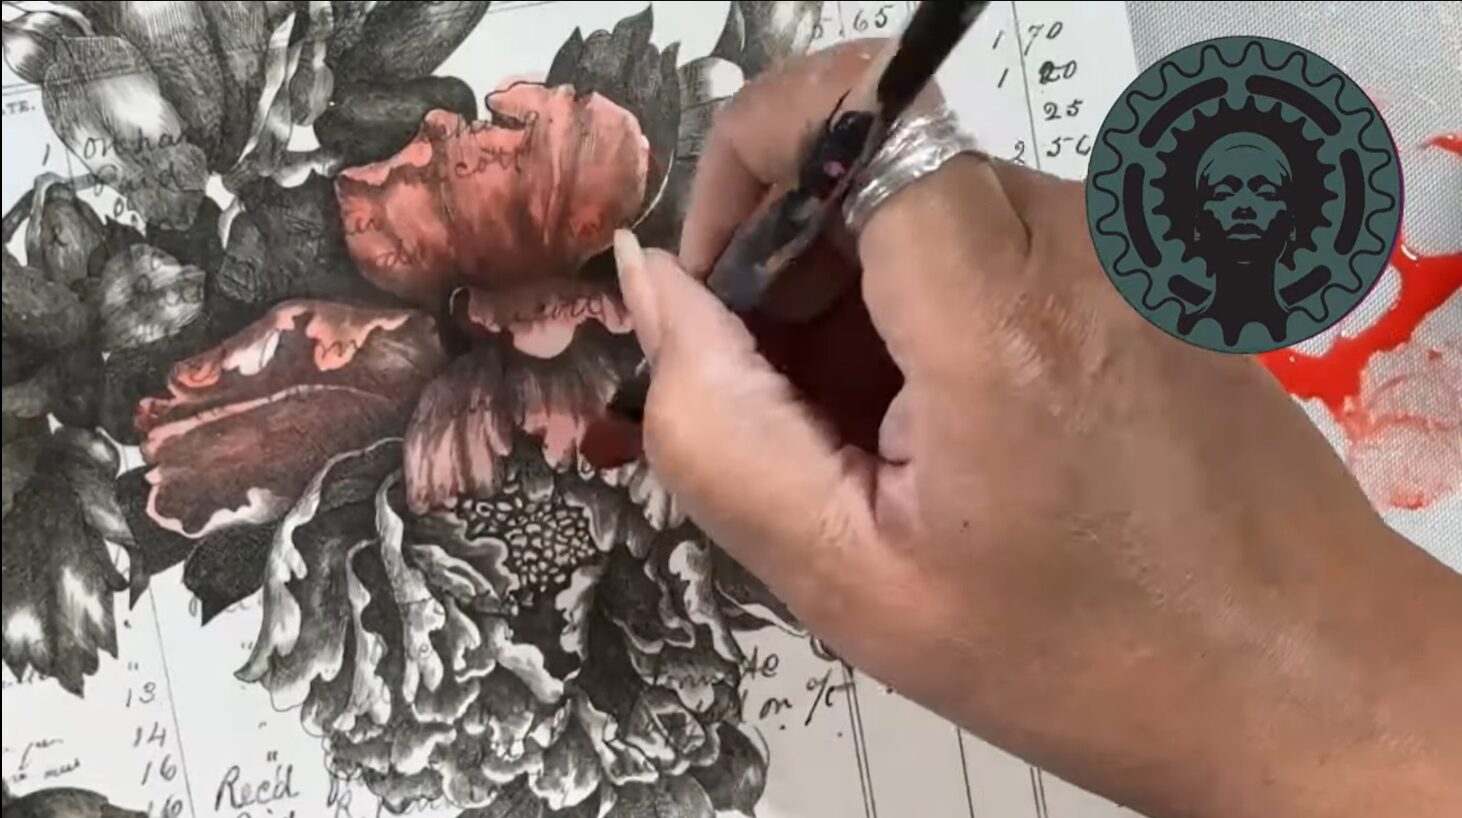
Step 6: Lift to Highlight
While your glaze is still wet, go back in with a clean brush and lift paint away from the areas you want to keep lighter. This gives your flower dimension without needing to paint in every single detail.
You can do this step more than once to build volume and soft shadows. Just remember: don’t overwork it. A little goes a long way.
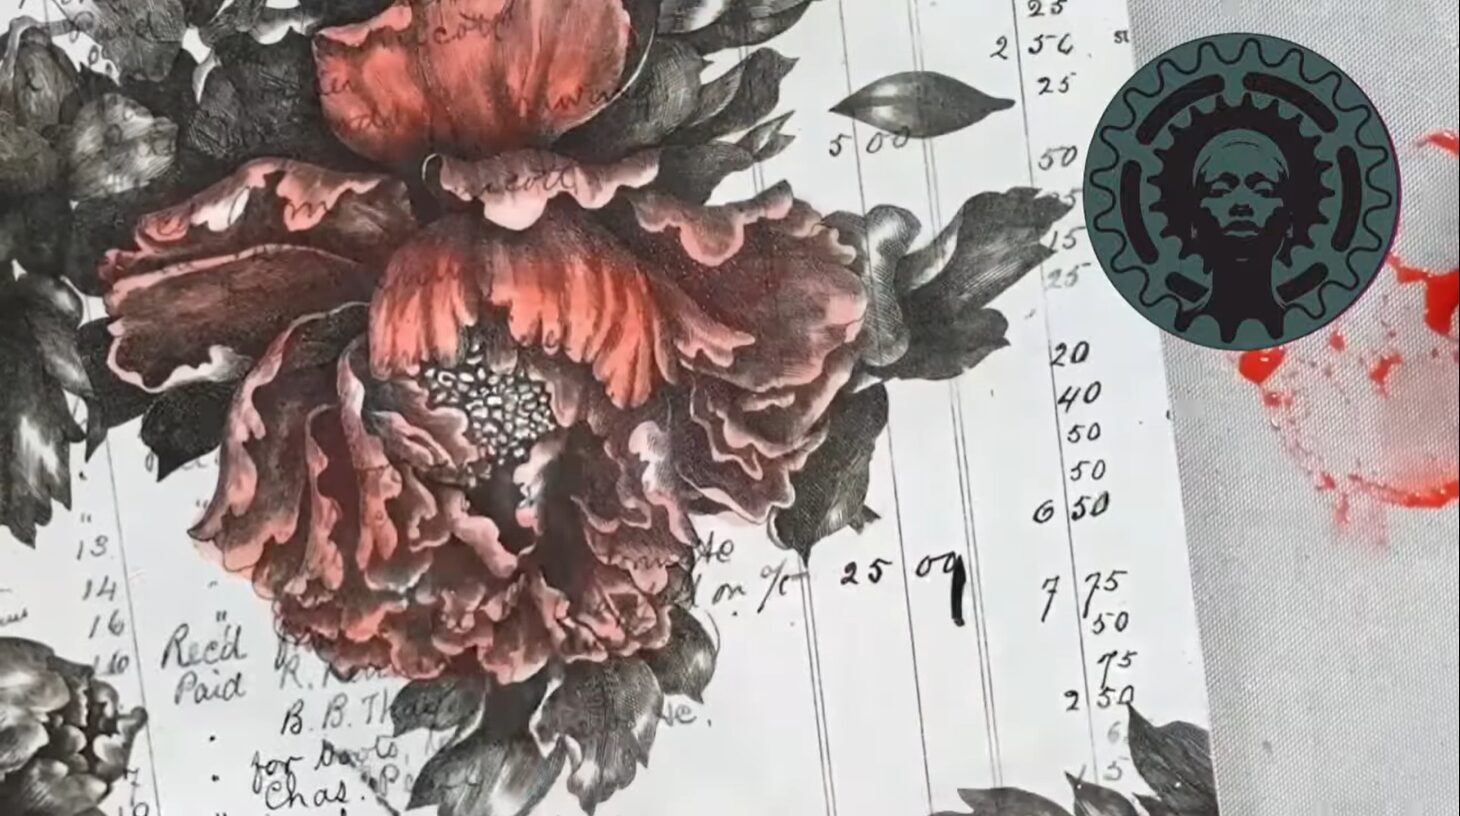
Step 7: Add Depth (If You Want)
Want more drama or a pop of color? Go back in with a second coat of glaze, or use straight paint in selective areas like petal tips for highlights or flower centers for more opaque applictions.
I did this by adding texture dots with a skewer in the center of the flower. It added contrast and made the bloom come alive.
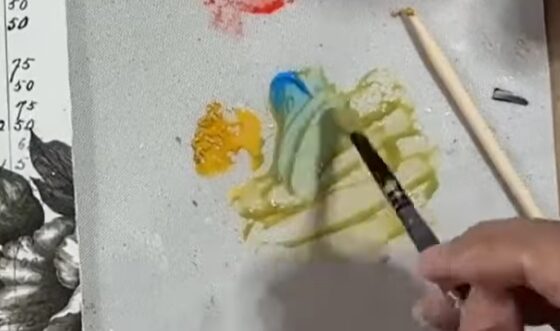
Step 8: Mix Your Own Colors If You Need To
I didn’t have a green on hand, so I mixed my own using the blue and ochre yellow I already had. To make sure the green harmonized with the flower, I added just a tiny bit of the red from the petals. This tip comes straight out of my Crafting in Color course (more on that below).
Color tip: Choose one of your colors, and add a touch of it to every color you mix to help your project feel cohesive and balanced.
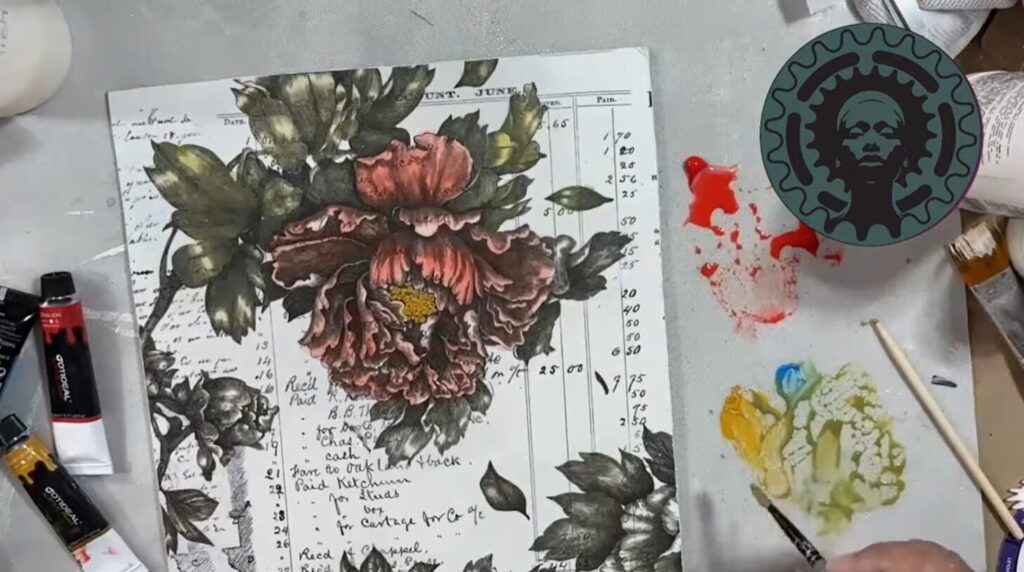
Step 9: Paint the Leaves
I followed the same method as the petals: light glazes, lifted highlights, and varying the color slightly each time I reloaded my brush. This helped the leaves feel natural and gave them some visual interest without needing perfect technique.
Step 10: Add Fun Final Touches
Just for fun, I painted swatches of the colors I mixed so I could remember what I used. Once it dried completely, I used a waterproof pen to draw some funky little boxes around them. Wonky, imperfect, delightful, just like creativity should be.
If this is your first time painting over decoupage, let me say this loud and clear:
You can do this.
You don’t need expensive supplies or a fine art degree. You need a little time, a little curiosity, and the willingness to try.
If your flower doesn’t look exactly like mine? That’s great. You’re not here to replicate, you’re here to create. Let the process teach you something. Let it be messy. Let it be fun.
This project is such a powerful reminder that art doesn’t live in the perfect… it lives in the possible.
Frequently Asked Questions
Yes! You just need to seal the paper with clear gesso (for acrylics) or watercolor ground (for watercolor). This gives your paint something to grip to.
Any paint will work. I used inexpensive craft acrylics and got beautiful results. For a sheer effect, mix the paint with a little clear sealer to make a glaze. If you are using a clay based paint, mix in a little clear coat so you paint doesn’t reactivate.
Use colors that work well together, and add a little of your main color into each mix. This keeps the overall project harmonious. (Want to learn more? Check out my Crafting in Color course.)
You can still use those! Just mix in a bit of water-based sealer to give them the transparency and flow you want.
Mist your tissue and stretch it gently before applying. Use decoupage medium under and over the paper, and work slowly. Prepping the surface and misting the paper are game-changers.
Want to Go Deeper?
If you loved this project and want to explore more ways to blend color, paint over paper, and experiment with mixed media, check out my courses at Roycycled Academy.
Whether you’re just getting started or looking to grow your skills, there’s something there for you.
And don’t forget to subscribe on YouTube and join me on Instagram, Facebook, TikTok, and Pinterest @Roycycled for more tutorials, encouragement, and creative connection.
