Turn A Plain Lazy Susan Into a Stunning Centerpiece
Are you ready to turn a thrifted find into a show-stopping decor piece? Today, I’m walking you through a beautiful layered decoupage project featuring the
Roycycled Burlap Roses Decoupage Paper! Whether you’re new to decoupage or a seasoned crafter, you’ll love how easy it is to achieve a wrinkle-free, bubble-free finish. Plus, I’ll share pro tips on color mixing, layering decoupage, and sealing your piece for a long-lasting result.
Step 1: Prepping Your Lazy Susan
I found this Lazy Susan at a thrift store, and since it likely spent years in someone’s kitchen, I needed to start with a good foundation. Instead of using just white chalk paint, I applied a stain-blocking primer to prevent any tannin bleed-through. If you notice dark stains showing through your primer, let it dry for at least 3 hours, and apply a second coat. This step ensures a smooth, clean base for your decoupage.
Step 2: Choosing and Trimming Your Decoupage Paper
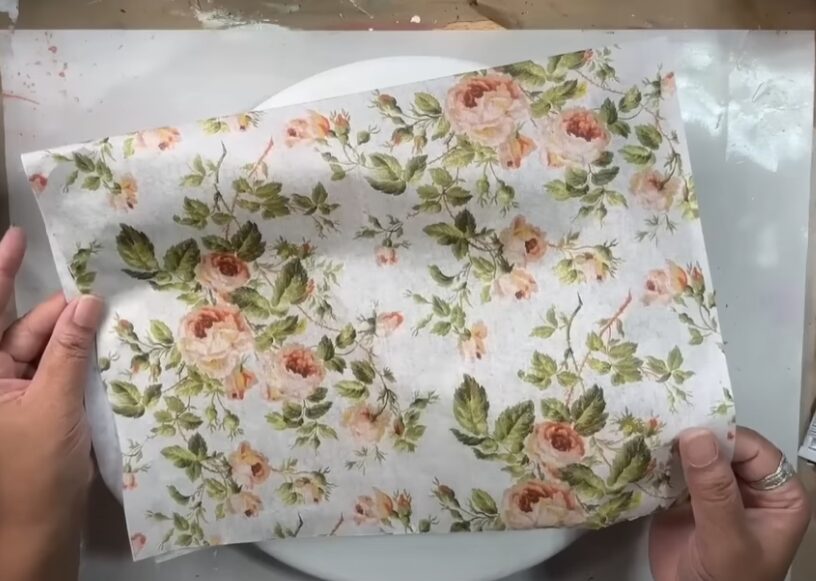
For this project, I’m using the gorgeous Roycycled Burlap Roses Decoupage Paper. Roycycled decoupage tissue is heavier than gift-wrapping tissue but still light enough to blend beautifully onto surfaces. I decided to layer it with Natural History, an older Roycycled design featuring beautiful typography.
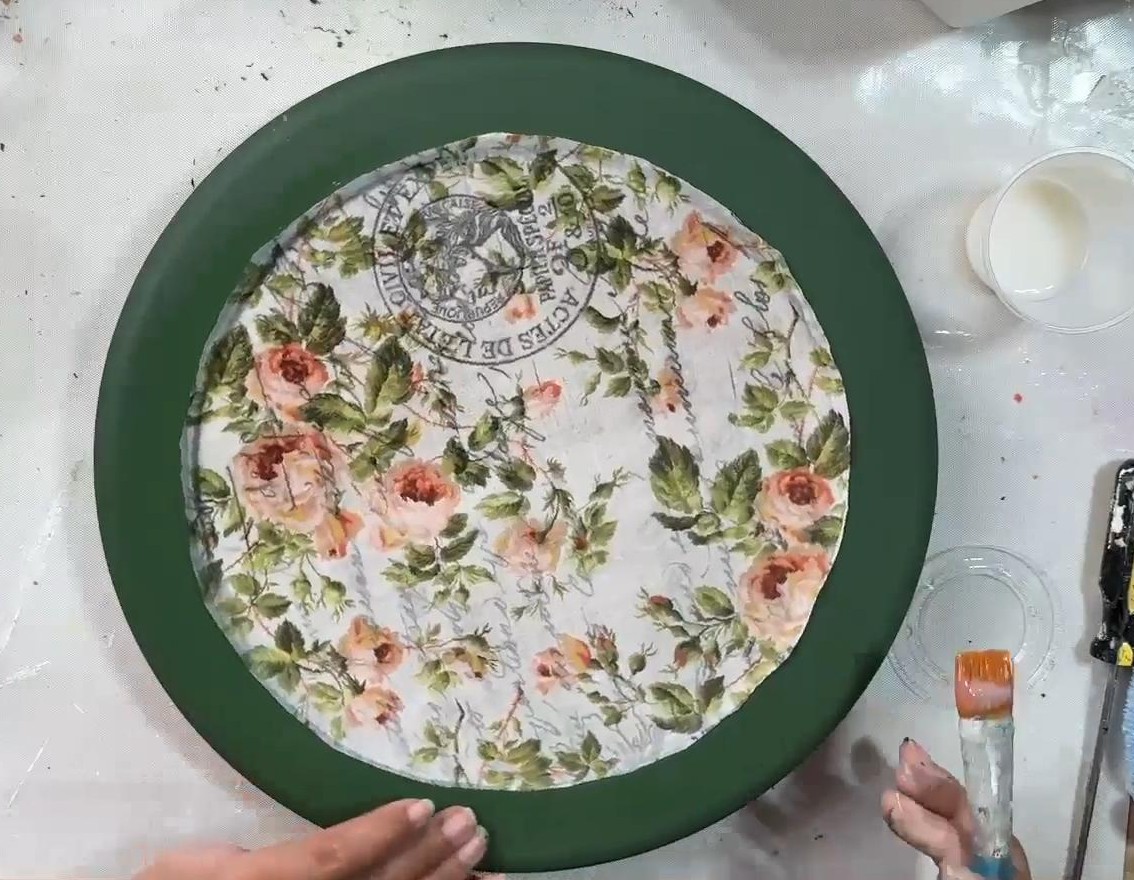
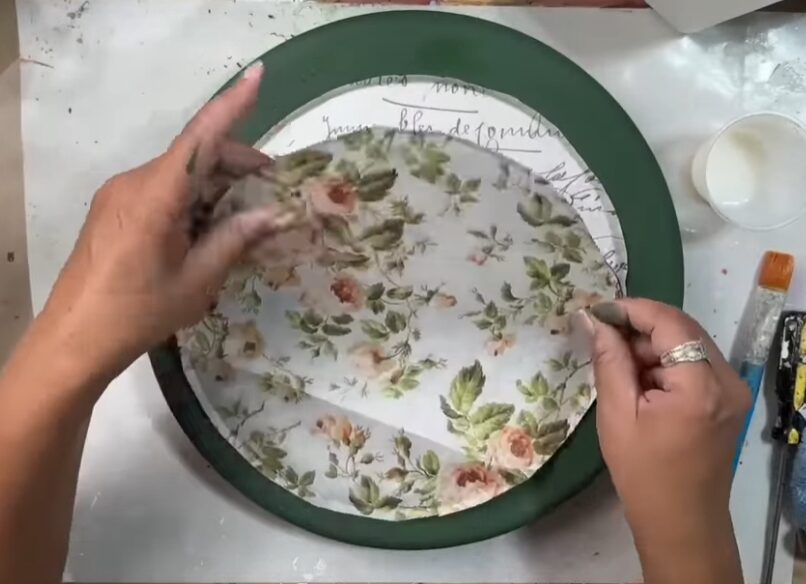
To ensure a perfect fit, I placed the paper on my Lazy Susan and used my fingernail to score the edges, leaving a small eighth-inch margin as a safety buffer in case I needed to reposition the paper later.
Step 3: Custom Color Mixing for a Seamless Finish
Matching your decoupage paper to your background is key! I didn’t have the perfect green for the trim, so I created my own by mixing chalk-style paint with acrylics. When mixing colors, keep these tips in mind:
Start with the closest color match you have.
Use pure pigments to shift your color (I added a warm yellow to lighten and brighten my green).
Consider how paint dries—chalk-based paints dry lighter but darken again when sealed.
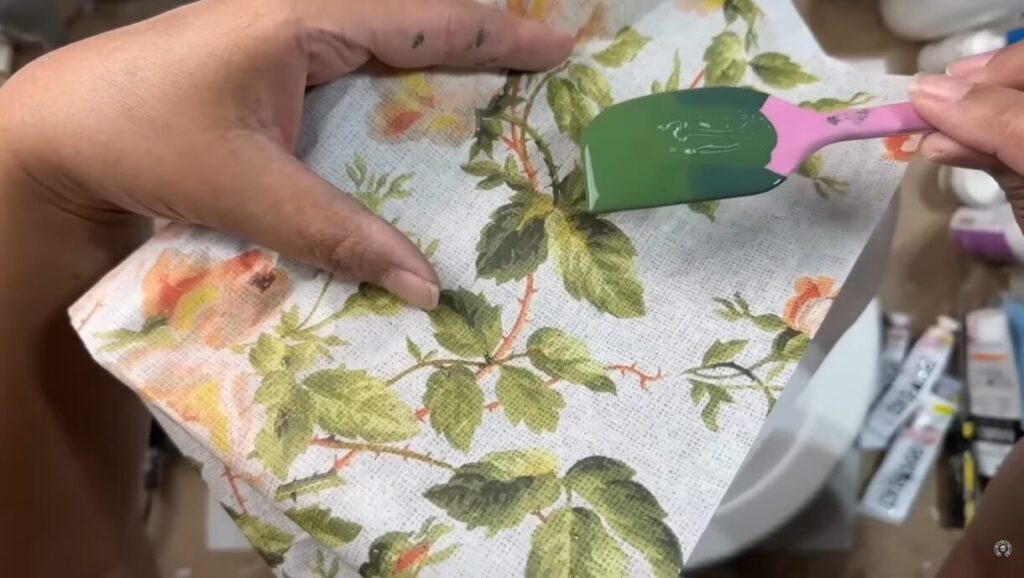
Using a spatula (yes, from Dollar Tree!), I mixed my paint and applied it to the trim of my Lazy Susan.
Step 4: The Secret to Wrinkle-Free Decoupage
One of my go-to techniques for a flawless decoupage finish is misting the paper with water before applying it. This allows the fibers to stretch fully before coming into contact with the decoupage medium, eliminating wrinkles and bubbles. Here’s how to do it:
Lightly mist your paper with water—don’t soak it!
Let it rest for a minute so the fibers relax.
Stretch the paper gently to prevent future movement.
Apply a water-based decoupage medium, using enough for full coverage but not so much that it pools.
When laying the paper down, work in sections, pressing gently to ensure contact while avoiding air bubbles. If you notice a dry spot, carefully lift the paper just enough to add more medium without fully removing it.
Step 5: Layering for Depth and Texture
For this design, I layered the Natural History typography paper beneath the Burlap Roses to create dimension. Because the decoupage paper is semi-transparent, the text subtly shows through the roses, adding an elegant touch. To enhance this effect, I applied a second coat of decoupage medium before the top layer dried completely.
Step 6: Trimming and Sealing for a Professional Finish
Once dry, trimming the edges is the final step to getting a crisp, clean finish. Here are my top tips for trimming decoupage paper without tearing:
Ensure your paper is completely dry before trimming.
Use a sharp craft knife and let the edge of your piece guide your blade.
If your paper starts lifting as it dries, snip small relief cuts around the edges to prevent contraction from pulling the paper up.
If needed, reinforce edges with heavy gel medium for extra durability.
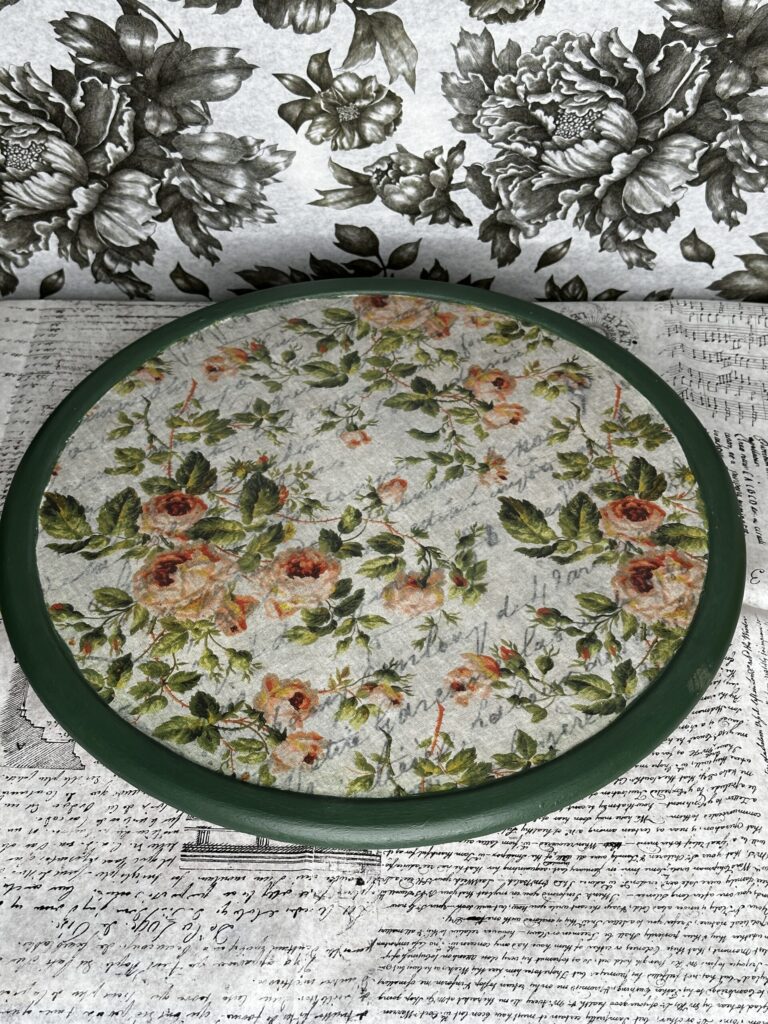
The Final Look
And just like that—our Lazy Susan is transformed! The Burlap Roses Decoupage Paper pairs beautifully with the layered typography, and that custom-mixed green on the trim ties everything together. Whether you’re flipping thrifted finds, crafting for your home, or selling handmade pieces, this technique is a must-try!

Supply List for the Lazy Susan Decoupage Project
Surface & Prep:
Thrifted Lazy Susan (wooden)
Stain-blocking primer (to prevent bleed-through)
Chalk-style or clay-based paint (base color)
Paint & Color Mixing:
Acrylic paint (for shifting and customizing colors—especially warm yellow)
Spatula or palette knife (Dollar Tree spatula works great!)
Paintbrush (for applying paint)
Decoupage Papers:
Roycycled Burlap Roses Decoupage Paper
Roycycled Natural History Decoupage Paper (or any background script paper)
Adhesives & Sealers:
Water-based decoupage medium, clear coat, or top coat
Heavy gel medium (optional, for tacking down layered edges)
Application Tools:
Fine mist spray bottle (for wrinkle-free decoupage method)
Soft bristle brush (for smoothing paper without tearing)
Small detail brush (for touch-ups around the edges)
Finishing Tools:
Sharp craft knife or precision blade (for clean trimming)
Cutting mat or protective surface
Paper towels or wipes (for cleaning up excess medium)
Ready to Try It Yourself?
- Get free tips, tricks, and inspiration. Become a Roycycled Insider!
Find Roycycled Decoupage Paper at a retailer near you! Visit Roycecycle.com
A: The secret is in the misting! Before applying your paper, lightly mist it with water and give it a minute to relax and stretch. This step allows the fibers to open up so your paper won’t pull and wrinkle when it hits the decoupage medium. No more wrestling with bubbles or creases—, just smooth, beautiful results.
A: Absolutely. And you don’t need to be a color expert to do it. Start with a chalk-style or clay-based paint that’s close to your target color, then shift it using acrylics. I prefer acrylics because the pigments are more pure, giving me better control. Don’t be afraid to experiment—that custom mix will take your project to the next level.
A: You sure can, and it can create gorgeous dimension. In this project, I layered two Roycycled papers: one with script and one with florals. Because the paper is semi-transparent, the typography subtly shines through the roses, giving it a layered, vintage vibe. Just make sure your bottom layer is dry before adding the top, and go over the top layer with medium while it’s still damp to enhance the blend.
A: If it’s a well-loved piece like a Lazy Susan from someone’s kitchen, start with a stain-blocking primer. It prevents those sneaky tannins from bleeding through and messing up your final look. Once primed and dry, your surface is ready to take on whatever beauty you’re about to layer onto it!
